Vegetarian cooking blog

Showing posts with label Snack. Show all posts

Thursday 15 October 2020

OATMEAL COOKIES

 Oatmeal Cookies are hearty and chunky cookies that are like granola bars in cookie form. Some days we are in a hurry or rush to get to work, and most times ignore our hunger pangs. This Cookie comes in handy. For those mid-morning or early evening hunger pangs this a healthy option to eat. Have fussy teenagers at home who skip breakfast for sleep😀? Ideal cookie for them.

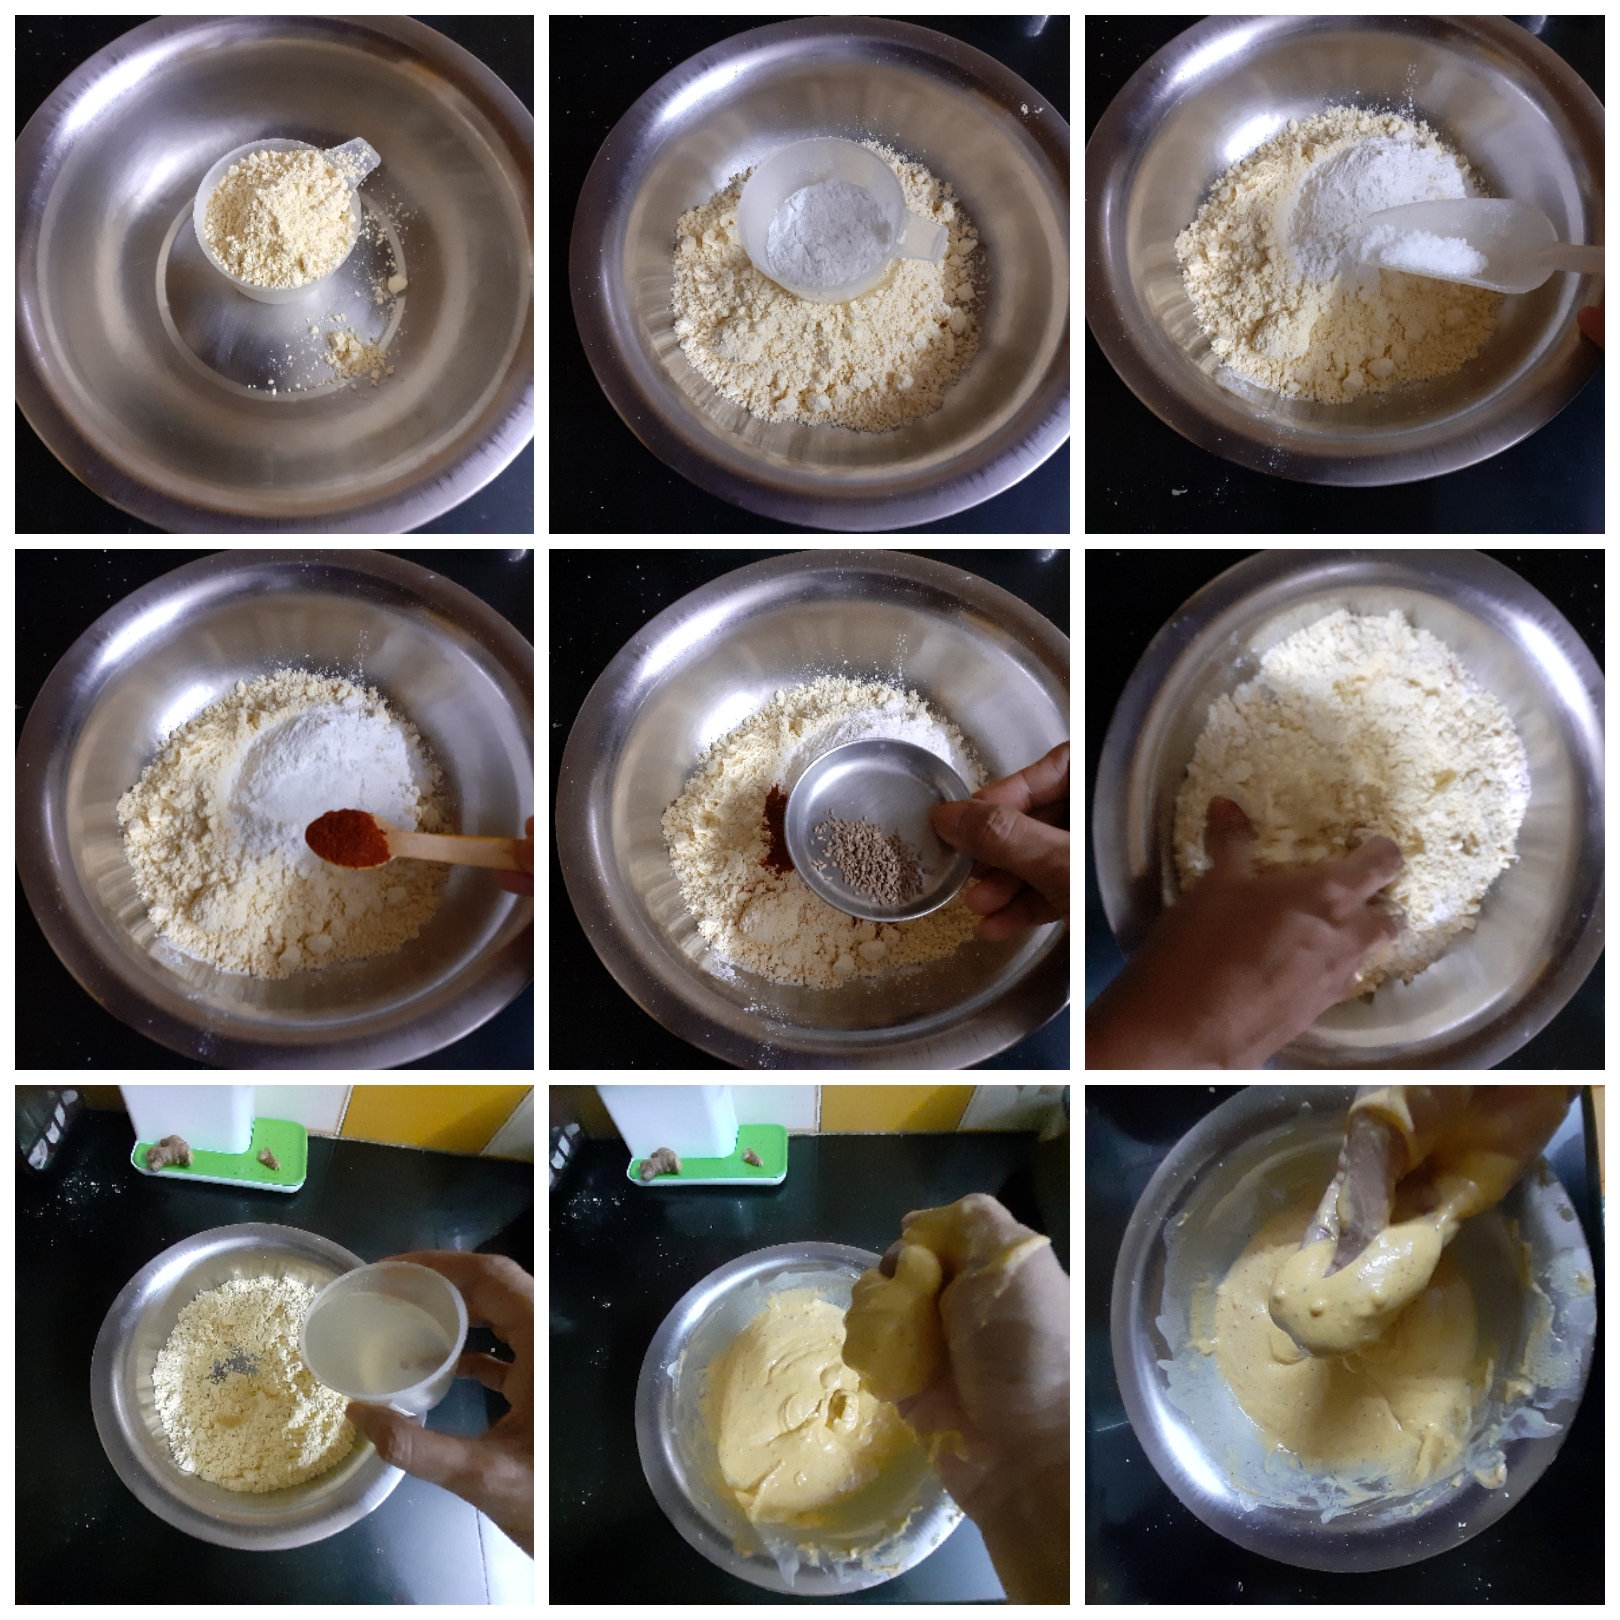
I am giving you such a simple recipe that one bowl and all the mentioned ingredients are what you need. No mess, mix up everything in a single bowl, scoop the cookie dough into a baking sheet, and done.

These cookies can be stored at room temperature for a week and stay good in the refrigerator for 15 days. I prefer to make them in batches that last me a week or a fortnight. They are very simple to make so I don't mind the process of making them regularly.

This Cookie requires Almond flour/almond meal, which is not available at all stores. Amazon has it though and I ordered it from there. Regular flour will not work for these cookies and will make them doughy. These cookies are not the crunchy ones but the chewy type.

While you are here please check out my other recipes like Blueberry Cheesecake, Apple tea cake, Apple Crumble, Savoury Muffins, and more... 


Here is the recipe for Oatmeal cookie-

 PREP TIME: 20                                      COOK TIME: 30Mins
 TOTAL TIME:50 MINS                          COURSE:  DESSERT
 CUISINE:  WORLD                              SERVINGS: 12 PIECES
 AUTHOR: Rajni Ram


Dry Ingredients:

Oats - 1 1/4 cup Instant or rolled (refer note1)

Almonds 1 handful or 50 gm 

Cashewnuts 1 handful or 50 gm

Walnuts 1 handful or 50 gm

Raisins 1/2 cup

Almond flour 3/4 cup (refer note2)

Cinnamon powder 1 tsp

Baking powder 1/2 tsp

Desiccated coconut 1/4 cup


Wet Ingredients:

Dates 100 gm pitted or 15 numbers after pitting

Hot water 1/4 cup or just enough to soak the dates

Honey 3 tbsp

Egg 1

Coconut oil or Olive oil 3 tbsp

Vanilla essence (optional)


Directions:

Soak the pitted dates in hot water, just until they are submerged. Preheat oven to 180 degrees for 10 minutes. While the oven is getting hot let's get the Cookie dough ready. Take the instant Oats and dry roast them on low flame for 3 minutes. We don't want to brown them, but just make them a little crisp. Keep feeling the oats with your fingers, when they hot enough and your fingers can't stand the heat, switch off the flame and let it cool while we get other things ready. Dry roast the Almonds, Cashewnuts, and walnuts, cool them slightly, and pulse them a single time in the blender. We want them to be partly broken.

The dates would have softened by now. Take a spatula or wired whisk and mash it to a smooth puree. Add all other ingredients mentioned under wet ingredients and combine well with a spatula. Add the dry ingredients to this mixture and mix well, such that all are well integrated. Now what you have at hand is a thick batter. 

Line a baking tray with parchment paper or baking paper and grease lightly. Now with an ice cream scoop or a deep round spatula scoop the batter and place them on the baking sheet, giving an inch distance(these cookies do not spread much) between them. Bake at 180 degrees for 30 minutes or until they turn golden brown. Do the skewer/toothpick test if in doubt. (prick through the center, if it comes out clean without any batter, the cookie is done). Enjoy the cookies with a hot cup of coffee, tea, or hot chocolate. Bon Appetit.


STEPWISE RECIPE FOLLOWS:

1. Soak the pitted dates in hot water, just until they are submerged. Preheat oven to 180 degrees for 10 minutes. Take the instant Oats and dry roast them on low flame for 3 minutes. Keep feeling the oats with your fingers, when they hot enough and your fingers can't stand the heat, switch off the flame and let it cool.


2.  Dry roast the Almonds, Cashewnuts, and walnuts, cool them slightly and pulse them a single time in the blender. We want them to be partly broken.


3. Now take a spatula or a wired whisk and mash the dates to a smooth puree. Add all other ingredients mentioned under wet ingredients and combine well with a spatula. 


4. Mix in the dry ingredients into this mixture and combine well until all are well integrated. We will have a sticky dough.


5.  Line a baking tray with parchment paper or baking paper and grease lightly. Now with an ice cream scoop or a deep round spatula scoop the batter and place them on the baking sheet, giving an inch distance(these cookies do not spread much) between them. Flatten the cookies with a spatula slightly. Bake at 180 degrees for 30 minutes or until they turn golden brown.


NOTES:

1. I have dry roasted the Oats as they are the instant ones. If using rolled oats, roasting is not required.

2. Almond flour can be made at home also by blanching almonds, dry them, and then grinding to a fine powder.

3. If one doesn't mind the skin of the almonds they can be directly ground to a fine powder.

4. I have added the Cinnamon powder at the end along with the dry ingredients.


Monday 12 October 2020

MIRCHI BAJJI/MIRAPAKAYA BAJJI/CHILLI FRITTERS

 Mirchi Bajji or Mirapakaya bajji as it is called in Andhra Pradesh, is popular street food in most South Indian states. The way of making them differs though. This snack is popular in Jaipur/Rajasthan too and the style of making it is different. This snack is made from a particular type of Chilli, called Banana Peppers or Bajji Milagai. They are a light shade of green and huge.

In this recipe, I have followed the Hyderabadi style, wherein the chilli is first processed by slitting it in the centre, de-seeding it, and stuffing it with a paste. The then chillies are coated with chickpea flour batter and deep-fried.

In the Rajasthani style, the Mirchi/chilli is de-seeded and is topped with a spicy mashed potato coating(not stuffed), then dipped in chickpea batter and then fried.

In some other states in South India, the chillies are just deseeded and then dipped in batter and deep-fried. This version is not the best way to make this bajjis though. The stuffing is what makes all the difference.

I am getting to the recipe without much ado. I request you to have a look at my other snack recipes like Semolina Cheese Balls, Kothimbir Vadi, Dahi Pohe/Moru Aval, Masala Wheat flour Papdis, and more..,

Here is the recipe for Mirchi Bajji/Mirapakaya Bajji for you-

 PREP TIME: 20                                         COOK TIME: 20Mins
 TOTAL TIME:40Mins                                  COURSE:  SNACK
 CUISINE:  INDIAN                                     SERVINGS: 6
 AUTHOR: Rajni Ram


Ingredients for stuffing:

Chickpea flour/Besan 2 cups

Tamarind paste 1 tbsp or Tamarind pulp 1 cup(refer note1)

Salt as required

Red chilli powder 1/2 to 1 tsp

Ajwain seeds/Omam 1 tsp

Water as required(if using tamarind paste)


Ingredients for batter:

Besan/ Chickpea flour 2 cups

Rice flour 1/4 cup

Salt as required

Red chilli powder 1 tsp

Ajwain 1/2 tsp

Hot oil 1 tbsp

Ingredients for Mirchi Bajji:

Bajji Chillies 12 numbers

Oil for deep frying

Processing the Bajji Chilli:

Wash then and pat them dry. With a sharp knife make a lengthwise slit in the center and remove the seeds complete with your fingers, or spoon. Be very gently or they may break. The chilli should be clean on the inside and devoid of any seeds.

Directions for making Mirchi Bajji:

 Once the processing of the Chillies is done, take all ingredients mentioned under stuffing except water and mix them well with your fingers. Now add water little by little to make a dough, which is neither too stiff nor too loose. (this procedure is if using tamarind paste)

If using tamarind pulp then take all ingredients mentioned under stuffing, in a bowl and combine them to form a dough, using the tamarind pulp. 

Now make small cylinders out of this stuffing dough and stuff it into the chillies. Note that the chillies need not be fully stuffed, making a cylinder of them ensures that the stuffing is there from stalk to tip. Repeat for all chillies.

Now take all ingredients mentioned under batter, except water and mix well with your fingers. Adding water little by little, form a batter that is not too flowy. It should be thick enough to coat the chilli. The chilli surface is very smooth and slippery. so the natter has to be a little thick(refer picture). After making the batter, put oil for deep frying in a Kadai and heat. Bring the oil to smoke point and reduce heat completely. Pour 1 tbsp of this oil into the batter, and mix the batter nicely with a spoon(be careful not to use your hands, the oil is very hot). The hot oil does the job of baking soda here, and make your bajji turn fluffy and crisp(secret out😀). Now it is time for frying. Holding the chilli by the stalk, dip it into the batter, use your fingers if required to coat the chilli well and drop them gently into the hot oil. Fry on medium-high until it turns a nice brown in colour. To serve, sprinkle some Chaat masala and enjoy. Bon Appetit.


STEPWISE RECIPE FOLLOWS:

1. Assemble all ingredients. Follow the processing of chillies step and set them aside.


2. This step is if you are using tamarind paste- take all ingredients mentioned under stuffing except water and mix them well with your fingers. Now add water little by little to make a dough, which is neither too stiff nor too loose. (if following this step ignore step 3)


3. This step is if you are using tamarind pulp: take all ingredients mentioned under stuffing, in a bowl and combine them to form a dough, using the tamarind pulp. 

( PICTURES SAME AS ABOVE, USE TAMARIND PULP INSTEAD OF WATER)

4.  Now make small cylinders out of this stuffing dough and stuff it into the chillies. Note that the chillies need not be fully stuffed, making a cylinder of them ensures that the stuffing is there from stalk to tip. Repeat for all chillies.


5. Now take all ingredients mentioned under batter, except water and mix well with your fingers. Adding water little by little, form a batter that is not too flowy. It should be thick enough to coat the chilli.


6. After making the batter, put oil for deep frying in a Kadai and heat. Bring the oil to smoke point and reduce heat completely. Pour 1 tbsp of this oil into the batter, and mix the batter nicely with a spoon(be careful not to use your hands, the oil is very hot). 


7. Holding the chilli by the stalk, dip it into the batter, use your fingers if required to coat the chilli well and drop them gently into the hot oil. Fry on medium-high until it turns a nice brown in colour. 


NOTES:

1. I usually make a paste of tamarind and keep it handy. This post is on my Facebook and Instagram handles. I will try to share that in the blog sometime soon. Store-bought paste also can be used, quantity should be 1.5 tbsp. If using store-bought paste, decrease the amount of salt in the stuffing.

2. For making Tamarind pulp take lemon size ball of tamarind, soak in warm water for 5-10 minutes and extract a pulp that comes to 1 cup. Use this to make the stuffing dough.

3. Pouring hot oil into the Bajji batter does the job of soda. It makes the Bajji fluffy and crisp and also gives it a good colour. 

4. While frying these Bajjis patience is required and fry them in high heat will give you an uncooked stuffing. 


If you tried this recipe and liked it please comment below. I would love to hear from you. If you have a query about the recipe email us and ill respond as soon as I can.

If you would like to receive our recipes in your mail please leave your mail id at the homepage. Every time Rajjo's Kitchen has a new post we will mail the recipe to you.

Monday 28 September 2020

SAMOSA PIE

When one wants to have Samosa but "I feel guilty having fried stuff" is the mood, what to do? You bake it😃 and call it a pie😄.

Well, I'm a fan of Samosas and love them fried, but the Mr. is on a no fried stuff mode, so I just went ahead and baked it. I did not expect to get a nicely browned crust but made a slight adjustment and I got baked Samosas which had a golden-brown crust. Happy moment.

I have used Chiroti Rava/ Suji in this recipe. Chiroti Suji is more popular towards Karnataka, where it is used in making Dosas, and other fried snacks. I use this Choroti Rava to make most fried food like Samosa, Kachori, Karachikai(sweet fried snack). This Rava gives the much-required crunch to these snacks. This Suji, when kneaded and rested, becomes as pliable as maida or refined flour. Chiroti Rava is available in all departmental stores. If Chiroti is not available it can be easily swapped with Maida.

While you are here please check out my other snack recipes like Masala Wheat flour Papdis( 2 ways), Unni appam(sweet), Thattai/Nipattu, Kothimbir vadi, Kuzhi Paniyaram, Suji Cheese balls, and more...

Here is the recipe of Samosa Pie for you-


   PREP TIME: 20                                          COOK TIME: 25Mins
   TOTAL TIME:45Mins                                  COURSE:  MAIN
   CUISINE: NORTH INDIAN                         SERVINGS: 6
   AUTHOR: Rajni Ram


Ingredients:

Chiroti Suji 2 cups

Maida 1/4 cup

Salt to taste

Potatoes 5 big cooked and mashed

Onion 2 small or 1 big finely chopped

Green Peas a handful (optional)

Red chilli powder 1 to 1.5 tsp

Coriander 1 tsp

Baking Powder 1/4 tsp

Cumin seeds 1.5 tsp (divided)

Turmeric powder 1 tsp

Amchur/dry mango powder 2 tsp

Fresh Coriander leaves chopped 1tbsp

Garam Masala powder 1/2 tsp

Oil for brushing and kneading


Directions:

To make the dough:

Take the Chiroti Rava in a mixing bowl and add the Maida to it. Add 1/2 tsp Cumin seeds. Add Baking powder and salt and mix well. Create a well in the centre and add 1 tbsp oil and combine well. No water must be added now. Mix in the oil nicely into the flour, takes about a minute. Now form a well again in the centre and adding water little by little combine to form a stiff dough. Rest the dough for 1/2 an hour at least before use. (Refer note 5)

To make the filling:

In a Kadai heat oil. Add cumin seeds and mustard seeds, and as they crackle add the chopped onions. Fry the onions until light brown and add the mashed potatoes. Now add salt, followed by red chilli powder, coriander powder, Amchur powder, and mix them all nicely such that all masalas get well incorporated with the potatoes. Finally, add the garam masala powder(picture not taken) and chopped coriander and stir. Allow the filling to cool down a bit.

To assemble the pie:

Preheat the oven to 180C for 10 minutes. Knead the Chiroti dough again and divide it into two halves-one slightly bigger than the other. Roll each of them into a circle like a Chapati. The bigger part of dough should be rolled out thicker than the smaller portion of the dough. After rolling the dough, grease the pie dish or any oven-safe dish that is flat. Take the dough that was rolled bigger and thicker, and press it to the bottom of the pie dish forming the base. Prick holes to the dough base as shown in the picture. Now fill in the stuffing on the base, leaving a little space on top to seal it. Now with the dough that was rolled thinner, cover the filling and start sealing the edges. To seal the edges, bring the bottom and upper edge together and give it a twist as shown in the picture. Make a cross-cut with a knife after sealing the stuffing. Now place the dish inside the oven and bake 200 C for 15 minutes. Remove and turn it over gently and bake again at 200 C for 5 minutes. Remove from the oven, turn it over again and now grill for 5 minutes(that's how I got the golden colour). The crunchy and tasty Samosa is ready to dig in. Enjoy. Bon Appetit.


STEPWISE RECIPE FOLLOWS:

  1. Take the Chiroti Rava in a mixing bowl and add the Maida to it. Add half teaspoon Cumin seeds, Baking powder and salt and mix well. Create a well in the centre and add 1 tbsp oil and combine well.  


2. Mix in the oil nicely into the flour, takes about a minute. Now form a well again in the centre and adding water little by little combine to form a stiff dough. Rest the dough for 1/2 an hour at least before use.


3. In a Kadai heat oil. Add cumin seeds and mustard seeds, and as they crackle add the chopped onions. Fry the onions until light brown and add the mashed potatoes. 


4. Now add salt, followed by red chilli powder, coriander powder, Amchur powder, and mix them all nicely such that all masalas get well incorporated with the potatoes. Finally, add the garam masala powder(picture not taken) and chopped coriander and stir. Allow the filling to cool down a bit.


5. Preheat the oven to 180C for 10 minutes. Knead the Chiroti dough again and divide it into two halves-one slightly bigger than the other. Roll each of them into a circle like a Chapati.


6. The bigger part of dough should be rolled out thicker than the smaller portion of the dough. After rolling the dough, grease the pie dish or any oven-safe dish that is flat. Take the dough that was rolled bigger and thicker, and press it to the bottom of the pie dish forming the base. Prick holes to the dough base as shown in the picture.


7. Now fill in the stuffing on the base, leaving a little space on top to seal it. Now with the dough that was rolled thinner, cover the filling and start sealing the edges. To seal the edges, bring the bottom and upper edge together and give it a twist as shown in the picture. Make a cross-cut with a knife after sealing the stuffing.


8. Now place the dish inside the oven and bake 200 C for 15 minutes. Remove and turn it over gently and bake again at 200 C for 5 minutes. Remove from the oven, turn it over again and now grill for 5 minutes(that's how I got the golden colour). The crunchy and tasty Samosa is ready to dig in.


NOTES:

1. Let not the Chiroti Rava stop you from making this dish. Just use Maida and continue as per recipe. Instead of 2 cups Chiroti and 1/4 cup maida, use 21/4 cup Maida or 2 cups maida and 1/4 cup wheat flour.

2. I have not used green peas in this recipe, it can be an add- in to the stuffing. If using pre-cook it and add it along with the potatoes in the recipe.

3. Feel free to increase or decrease spice levels as per taste.

4.. If you are not particular about the browning on the top, it is fine to not grill, but I would recommend it because it is really worth the 5 minutes.  

5. I made 2 Samosa pies with the quantity of flour and potatoes used here.

6. Holes are pricked to the dough base after placing on the pie dish to avoid puffing. Ensure that you follow this step. If the pastry puffs the crunchiness will be compromised.

7. After the filling is put in and the edges are filled, make a cross-cut to ensure cooking is even through the layers.


If you tried this recipe and liked it please comment below. I would love to hear from you. If you have a query about the recipe email us and ill respond as soon as I can.

If you would like to receive our recipes in your mail please leave your mail id at the homepage. Every time Rajjo's Kitchen has a new post we will mail the recipe to you.

Sunday 9 August 2020

MASALA WHEAT FLOUR PAPDIS(BAKED)

Masala Wheat Flour Papdis are crunchy crisps made of wheat flour. The wheat flour here can be easily replaced with maida/refined flour or multigrain flour. I usually fry these Papdis, but this time I have baked them as per the request of friends and followers as they wanted something that was not deep-fried. That said, these Papdis can be fried too and I have given both options in this recipe.

When we bake a snack that is traditionally deep- fried there is always a difference in texture. It would be wrong to say that they taste almost like fried ones. The taste is the same, the papdis are crunchy too, but there is a difference in their textures. I also believe that when we prefer a baked snack over a fried one we are willing to adjust to the minute differences that are bound to be there because the technique used is different. Therefore you will not find phrases like "baked but almost like fried" or "baked but as good as fried", on this blog. Baked is baked and fried is fried, and somewhere there is a compromise in either, shape, colour, texture, taste of the dish. I am not saying this only about the current recipe but in general. When a deep-fried dish is baked there are differences.

This is why I try to keep the fried ones fried, but sometimes I do give in to a little experimenting. I won't do something because it is a trend, but if I do experiment and the result is blog-worthy I will certainly share it with you all.

Now, these Papdis can be served with tea, they last for a long time when stored in an airtight container. I also make Papdi Chat(street food delicacy) with these, and since they are firm than the Maida papdis, they hold up the sweet curd and chutneys of the Chaat well.

While you are here please do look at other snack recipes by Rajjo's kitchen like Semolina Cheese Balls, Kothimbir vadi, Stuffed kuzhi Paniyarams, Kachori, Savory Muffins and more...

Here is the recipe of Wheat flour Papdis for you--

PREP TIME: 15Mins                                       COOK TIME: 45 Mins
TOTAL TIME: 60Mins                                     COURSE: SNACK
CUISINE: NORTH INDIAN                            SERVINGS: 40 pcs
AUTHOR: Rajni Ram


Ingredients:

Wheat flour 2 cups       (1 cup =150 ml)                                                                      Suji(semolina) 1/2 cup                                                                                                Salt as per taste                                                                                                            Red chilli powder 1 tsp                                                                                                Ajwain(Omam/Carrom seeds) 1 tsp                                                                            Oil 3 tbsp for flour  (refer note1)                                                                                  Fresh Coriander or Methi(fenugreek)leaves  1/2 cup finely chopped                          White sesame 1 tsp (optional)                                                                                      Water as required      

Directions:

In a dish take the wheat flour and add the suji/semolina to it. Now add the salt, red chilli powder, ajwain followed by the 3 tbsp oil. Start mixing the flour with your fingers, such that the spice powders and oil are well mixed with the flour. Now take some flour in your palm and clamp it together with your fingers. If the flour holds shape, water can be added little by little now. But before that add the chopped coriander/methi leaves, mix it with the flour well and now start adding water little by little. We want a stiff dough here. The consistency should be like the dough for Poorie. Now apply very little oil on the dough and rest it or 15 minutes.  Now divide the dough into 4 or 5 balls. Roll out each ball into a thin circle, flour for dusting if required. Sprinkle some sesame seeds on the rolled and flattened dough and roll again so that the sesame seeds stick to the dough. Now with a cookie cutter or lid of a bottle cut into a circle. Remove excess dough from sides. prick holes with a fork on the little papdis.                                                                     

To bake them: Preheat oven to 180 C for 10 minutes. Place the little circles into a baking tray after pricking holes,  brush with a little oil(this step is optional), and bake at 180 C for 8 minutes on one side, flip them after 8 minutes and bake again for 8 minutes. Remove from oven, let them cool and store in an airtight container. Repeat this process for the whole amount of dough.

To fry them: Take oil in a Kadai and heat. The oil should be medium hot. The dough when put should sizzle and rise up immediately. This is the right temperature. Prick the papdis with a fork and gently drop them into the oil and fry until all bubbles have subsided and the papdis are light brown in colour. Cool and store in an airtight container. 

The crunchy and spicy Masala Wheat Flour Papdis are ready to serve with tea or to be made to a Chaat item. Enjoy. Bon Appetit.


STEPWISE RECIPE FOLLOWS:

1. Assemble all ingredients. Take the Wheat flour in a dish and add the Semolina/Suji to it.


2. Now add the salt, red chilli powder, ajwain, and oil to the flour.


3. Start mixing the flour with your fingers(without adding any water at this stage). The spice powders and salt must mix evenly with the flour. Take some flour in your palm and try to clamp it within your fist. When you open your fist the flour should hold shape and not break away.


4. Now add the finely chopped fresh coriander or Methi leaves, and adding water little by little form a stiff dough. The consistency should be like Poori dough. Rest the dough for 15 minutes.


5. Now divide the dough into 4 or 5 equal parts. Take one ball at a time, dust it with flour and roll it out like a chapati, sprinkle some sesame seeds and roll again lightly, so that the seeds stick to the dough.


6. Now with a cookie cutter or lid of a bottle make small circles. Take away the excess dough. Prick the circles all over with a fork.


7. To bake- preheat oven to 180 c for 10 minutes. Brush some oil over the Papdis, place them on a baking tray and bake at 180C for 8 minutes on one side. Remove the tray, flip over the papdis and bake again for 8 minutes. Remove from oven and cool. Store in an airtight container.  


8. To fry them- heat oil in a Kadai. Oil should be medium hot. Check the temperature by gently dropping a small bit of dough into the oil. If it sizzles and rises immediately, this is the right temperature. Now fry the papdis in oil at medium heat until all the bubbles subside and the papdis are light brown in colour.


NOTES:                                                                                                                        1. Adding adequate oil to the flour is a crucial step, the oil is the one that imparts the crunch to the Papdis. After step 3 if the flour is still not holding shape, then add another teaspoon or two of oil to the flour, rub it into the flour and check if it holds shape now by claiming it in your fist. If it does, start mixing water.

2. It is important to prick the Papdis with a fork before baking or frying as otherwise, they will rise/puff up thereby losing the crunch. So pricking holes is a crucial step.

3. The temperature of the oil is important, the method to check the temperature is given in step 8, which should be followed. 

4. The timing in each oven may vary to bake, so 2 to 3 minutes less or extra time may be required.     


Thursday 6 August 2020

THATTAI/NIPPATU

This savory recipe is a popular South Indian snack and is made during festivals like Janmashtami and Deepawali. In South India festivals are incomplete without making rice-flour based snacks and homemade sweets. 
Usually, the rice is soaked, the water drained, dried on a cloth, and then ground to a flour. Nowadays since most of us are busy both at home and work, I have used store-bought rice flour for this recipe, as it saves time. The most important step in this recipe is the proportion of rice flour and Urad dal flour, which I  have shared below in the recipe. Regarding the use of Butter and its substitutes please refer to the notes.  

In this recipe, Rice flour, Urad dal flour, butter, and spices are combined to form a dough, which is flattened and deep-fried in oil.
To give this recipe my twist I have added another ingredient- a little Pottukadalai/Chutney chana(fried gram)flour. This makes the Thattai crunchy. Grated or sliced coconut can be added, but in this recipe, I have not used them. 

While you are here please have a look at my other recipes like 
Vella Aval/Sweet Poha, Atte ka sheera, Sugiyan, Chakkara Pongal, Carrot Kheer,
Akkaravadisal and more...

Here is the recipe of Thattai/Nippatu for you--

PREP TIME: 15Mins                                       COOK TIME: 45 Mins
TOTAL TIME: 60Mins                                     COURSE: SNACK
CUISINE: SOUTH  INDIAN                            SERVINGS: 20 pcs
AUTHOR: Rajni Ram


Ingredients

Rice flour 1 cup (1 cup=200 gm)                  
Urad dal flour 1 tbsp 
Fried gram flour(Porikadalai/Pottukadalai/chutney chana) 1 tbsp
Butter 1 tbsp 0r 10 gm
Salt as per taste
Red chilli powder 1 tsp( add more for more spice)
Coarsely broken peanuts 1 tbsp
fried gram dal(Pottukadalai) 1 tbsp
Curry leaves around 10 finely chopped
Asafoetida 1/2 tsp
White sesame 1 tsp  
Water as required  
Oil for frying

Directions:
For Urad dal flour--Take a handful of urad dal and dry roast them in a Kadai until light brown and you get a nice aroma. Cool them and grind them to a fine powder and also pass it through a sieve, discard the residue.

For fried Gram flour/Pottukadalai flour- Put a handful in a blender and grind them to a fine powder. Pass it through a sieve and discard residue if any.

 Now in a dish take the rice flour and add the urad dal flour and fried gram flour. Add the butter, salt, chilli powder, asafoetida, coarsely broken peanuts, fried gram, curry leaves, white Sesame, and mix nicely. The flours, spice powders, and butter should combine well. Now add water little by little to make a stiff dough. 
Now in a Karahi take oil for deep frying and heat. While the oil heats up start shaping the Thattai. Take a plastic sheet or Aluminium foil and grease it with oil well. Grease your palms also with oil. Now pinch a small amount of dough(little bigger than lemon) and place it on the plastic/aluminum sheet and using your fingers flatten the ball to a thin circle. Take a fork or toothpick and prick holes all over the dough. Check if the oil is hot enough. To test take a small piece of dough and put it in the oil. If it sizzles and rises immediately then the oil is ready for frying. Now gently lift the foil in your left hand and ease the flattened dough into your right hand by reversing the foil and gently peeling it away. Now gently drop the flattened dough into the oil and fry flipping both sides. Keep flipping and frying until all bubbles in the oil subside and the Thattai is golden in colour. The Spicy and crunchy Thattai is ready to munch as it is or serve as a tea time snack or to offer guests during festivals. Enjoy. Bon Appetit.

STEPWISE RECIPE FOLLOWS:

1. Assemble all ingredients. Follow the method given above for Urad dal flour and fried gram/Porikadalai flour. Coarsely pulse the peanuts too.

2. In a dish take the rice flour, Urad dal flour, fried gram flour, butter, and all other ingredients excluding water and combine nicely.

3. Now add water little by little and form a stiff dough. Take oil ina Karahi to deep fry and heat. heat should be medium-high. 

4. To form the Thattai, take a plastic sheet or aluminium foil and grease it with oil. Grease your palms also with oil. Pinch a small portion of dough, form a ball, and place it on the sheet. Flatten it with your fingers to form a thin circle. Take a fork and prick all over the Thattai.


5. To check if the oil is hot enough drop a small bit of dough in the oil if it rises immediately then the oil is ready for frying. Using your left hand lift the foil and reverse it on your right palm and gently peel away the foil in a backward motion.
Now gently release the flattened dough into the oil and fry flipping both sides, until all the bubbles in the oil subside and the Thattai is a golden colour. Repeat this process for all the dough and store the Thattai/ Nippatu/Chekkalu in an airtight container. 


NOTES:
1. Butter is one ingredient that gives the Thattai its crunch and also it's colour. So do not exclude it.  Some recipes suggest using Ghee or hot oil in the dough. I recommend sticking to butter as ghee and hot oil turn the Thattai hard and also the colour turns too brown.
2. Any butter unsalted or salted is fine.
3. Using Pottukadalai/ fried gram powder gives a nice taste and crunch. If you don't have it handy, carryon with other ingredients. The Thattai will still turn out fine.
4. Using white sesame also gives a nice taste to the recipe. If you have it handy add some for sure 
5. Coconut gratings or small bits of coconut are also added, but this time I have not added them. 


If you tried this recipe and liked it please comment below. I would love to hear from you.

If you want the recipes emailed to you leave your id in the homepage near the📧
icon. Whenever we have a new post the recipe will be mailed to you. Thank you for showing interest in Rajjo's Kitchen.


Monday 27 July 2020

SUGIYAN

Sugiyan or Sukhiyan as it is called is a traditional snack in Kerala and Tamilnadu. It is also made in Andhra Pradesh and is called Boorelu. This snack is like a sweet version of the Aloo Bonda where the Aloo is replaced with a sweet Chana dal or Moong dal and Jaggery filling and instead of Besan Urad dal and rice flour are used as a batter to cover the filling(Poornam). Coconut is also added to the filling that enhances the taste. This is also a snack that people make for festivals. As the festival time is nearing blogging this recipe may be helpful. I usually make it around Navarathri and Diwali to serve it to guests who visit home.
As I  had mentioned that the poornam (filling) is made with Moong dal too, but I personally feel the chana dal filling is tastier. Some also use whole moong(payaru) to make the filling.
 I use this filling of Sugiyan to make Puran Poli(Boli/Bobbatlu/Hoolige) also. So what I usually do is make them both simultaneously. I use wheat flour majorly with a hint of maida to make Puran Poli, the Sugiyan is had the same day as it doesn't taste fresh or hold good the next day, it is like an instant snack, whereas Puran Poli can be consumed with 2-3 days if stored properly.
One needs to grind the batter carefully and the rest of the recipe is quite easy. In this recipe, I will also show you an easy way to make the filling.

While you are here check out my other dessert recipes like Pineapple Rabdi,
 Carrot Kheer, Chakkara Pongal, Atte Ka Sheera, Akkara vadisal, and more. 


Here is the recipe of Sugiyan for you--
 PREP TIME: 20 Mins(1 hr soak)                         COOK TIME: 40 Mins
TOTAL TIME: 60 Mins                                          COURSE:  SNACK
CUISINE: SOUTH INDIAN                                   SERVINGS: 6
                                                                              AUTHOR: Rajni Ram


Ingredients:
Urad dal 1 cup soaked for 1-hour 
Chana dal 1 cup roasted to light brown
Turmeric powder 1/2 tsp
Rice flour 2 tbsp
Jaggery 1 cup powdered
Coconut grated 1/2 cup
Cardamom powder 1 tsp
Oil for frying

Directions: for the filling:
 Dry roast the Chana dal to a light brown, you will get a nice aroma of the dal. Switch off the flame, remove and cook in a pressure cooker with 1/2 tsp turmeric powder and adequate water for 2-3 whistles(not more), as we want the dal to be rightly cooked, not mushy. Once the dal is cooked and the pressure in the cooker has subsided, remove the dal and put it in a strainer for all the water to drain off for about 5 minutes. Now put the dal into the dry grinding unit of the processor and blitz. Open stir the contents well and blitz again to a fine powder. After grinding it will resemble wet sand. Now in a Karahi put in the jaggery and the ground dal, followed by grated coconut( add no water) and keep stirring, in low flame. The jaggery will start melting and within 5 minutes of stirring the filling will become well combined. Even if it seems a little dry, don't be tempted to add water. The jaggery will be enough to bind it. Add the Cardamom powder and keep stirring and when it forms a lump, put off the flame and let it cool. Once the filling has cooled, make small balls of them and keep aside.   

Directions for the outer crust:

Soak the Urad dal for 1 hour and grind. Don't allow it to soak for a long time, as then it soaks up a lot of oil while frying. The dal has to be ground to a smooth and thick batter, with water as required. The batter should stick to the filling and not roll off it, that should be the consistency. A runny or flowy batter will not stick to the filling. After grinding transfer to a dish, add 2 tablespoons of rice flour and 1/2 tsp salt. Now add little water if required as the rice flour would have absorbed all moisture from the urad dal paste. 

Directions to make Sugiyan:
Heat oil for frying to medium-high. Now take one ball at a time, roll it in the batter, or smear the batter all over the filling, it should be a thick coating or it will split in the oil and, drop them gently into the oil. Fry 4-5 of them at a time. Remove when golden brown in colour. Drain them on an absorbent paper. Repeat for the entire lot of filling. The delicious Sugiyan is ready. Serve with tea or make it as Prasad(offering) for Puja and enjoy it. Bon Appetit.

STEPWISE RECIPE FOLLOWS:

1. Assemble all ingredients. Soak the dal for an hour. Dry roast the Chana dal and pressure cook for 2 -3 whistles and no more.

2. For the Outer crust(cover)- Grind the soaked Urad dal by adding little water to a smooth but thick paste(idli batter consistency or a little thicker also is fine). Stir in 1.5 to 2 tablespoons of rice flour. If the batter gets too thick, add a little amount of water to get it back to the right consistency, given above. ( I forgot to take a picture of adding Rice flour, so please keep in mind and ad it).


3. For filling- Dry roast the Chana dal until light brown in colour, you will get a nice sweet aroma when you are getting to that stage. Pour required water and add turmeric powder and pressure cook it for 2-3 whistles, and not more. Once the pressure reduces, take the dal and drain it completely of all the water and allow it to cool for 5 minutes.


4. Now put the warm Dal into the dry grinding jar and blend to a powdery texture, without any water. Give it a mix and spin again, the mixture should be fine and should resemble wet sand.


5. Put this ground Dal mixture in a Kadai and add the jaggery and grated coconut to it. Switch on the flame on low and start stirring this mixture. Do not add any water, the jaggery will start melting in the heat and help in combining. Add the cardamom and keep stirring until the mixture comes together and forms a lump. Put off the flame and cool the mixture.


6. To make the Sugiyan-  Heat oil in a karahi for frying. Heat should be medium-high. Now make lemon sized(or a little bigger too is ok) balls of the filling and keep it aside. Check if the oil is hot by dropping little of the batter into it. If it sizzles and rises immediately, it is ready for frying.


7. Now take the Urad dal - Rice flour batter and dunk each ball into it gently, use your hands to smear the batter on the filling if required ad cover the ball. Gently drop it into the oil and fry to a golden brown colour. 4-5 Sugiyans can be fried at a time. Drain them on absorbent paper. Repeat for the entire filling and enjoy them hot.


NOTE:
1. I recommend not soaking the Urad dal for more than an hour as it soaks in lot of oil while frying.
2. The jaggery can be reduced to 3/4 cup depending on how sweet it is.
3. I forgot to take a picture of adding the rice flour, so don't forget to add it if following only the pictures.

If you tried this recipe and liked it please comment/ tag Rajjo's kitchen on Facebook and Instagram and please follow us on my blog https://rajnirams.blogspot.com/

If you wish to receive the recipes as an email please leave your id on the homepage near the mail icon. Whenever Rajjo's Kitchen has a new post it will be mailed to you.


TOFU AND STIR FRIED VEGETABLES IN HOT SCHEZWAN SAUCE

  Any Tofu lovers? I agree its an acquired taste,but going by the health benefits it has to offer, I try including it in my diet now and the...