Vegetarian cooking blog

Tuesday 30 June 2020

Stuffed Mushroom Tikka

I have always struggled with cooking Mushrooms in the initial years of my cooking. Every time I made a subji ( side dish), it would run watery and I had almost given up on making the vegetable at home. Then I chanced upon an article on the right way of cooking Mushrooms and I got back to making them again at home, and that too with near perfection. That said, this recipe is a starter and though a lot of steps are involved, they are pretty simple. Serve it at home to make a simple meal special, or serve it at a party for friends asking you the recipe. You can bake, Tava roast or deep fry the tikkas. Let's get to the recipe right away.

PREP TIME: 20 Mins+ Marination 1hr       COOK TIME: 30Mins
TOTAL TIME:1 hr 50 Mins                                COURSE:  MAIN 
CUISINE: SOUTH INDIAN                         SERVINGS: 4
                                                                    AUTHOR: Rajni Ram

Ingredients:
Button Mushrooms 1 packet
Paneer/ cottage cheese 200 gms grated
Gram flour/ Besan 1 cup
curd 1 cup
Fresh coriander 1tbsp finely chopped
Salt to taste
Red chilli powder 2 tsp( 1 tsp each for filling and tikka mix)
Coriander Powder 2 tsp( 1 tsp each for filling and tikka mix) 
Turmeric 1/2 tsp
Chat Masala 1/2 tsp 
Garam Masala 1/2 tsp
Green Chilli 2 finely chopped
Mushroom stalks finely chopped

Mushroom Preparation:
Wash the Mushrooms well under running water and pat them dry with an absorbent towel. Gently break away the stalks from the mushroom. Chop the stalks finely and keep them aside( we will use it for the filling).

Directions for the tikka mix:
In a dish take the curd and add all the dry spices- salt, red chilli powder, coriander powder, garam masala( don't add the chat masala), and mix nicely. Add the gram flour little by little and make a thick batter. Don't add any water the curd will be enough. You can add 1 tsp lemon juice if you like a little sourness, this is totally optional. Don't add the lemon juice if the curd is sour. Keep aside. 

   
Directions for filling:
   Crumble the paneer or grate it. In a Karahi or pan take 1 tbsp oil and heat it. To this add turmeric and chopped green chillies and saute. Put in the chopped Mushroom stalks and saute on high flame. The mushroom will release water and dry out again. Now add the crumbled paneer to this and mix. Add salt, red chilli powder, coriander powder, and chat masala. Saute well. Add the finely chopped coriander and turn off the stove. Allow the mixture to cool.

Overall directions:
 Fill the mixture into the mushroom caps. Fill up to the brim and gently press so that they get packed. Coat each mushroom with the prepared batter nicely and arrange on a plate filling side up. If not serving immediately you can refrigerate it and then either bake it, Tava roast it or deep fry it.

If BAKING, Preheat oven to 180 degrees,  grease a tray and bake at 180 degrees for 30 minutes. Since microwaves have temperature variations, look out for doneness between 20 to 30 minutes. Arrange mushroom on a baking tray, facing the filling side up. Midway stop and turn over the mushroom to the other side and continue baking. When the mushrooms turn a golden brown and the batter is not raw, the mushrooms are done.

If TAVA ROASTING, drizzle oil on the Tava and heat. Arrange the mushrooms Filling side down. For this method, you should have coated the mushrooms well with the batter. Once a side is done flip it over and cook the other side.  

If DEEP FRYING,  take a small quantity of oil in a Karahi and heat it. Drop the mushrooms gently a few at a time, the filling side facing up. In a few seconds gently turn over and cook the other side. Once they are golden in colour, remove from oil and place on kitchen tissues. This method needs the batter to be coated well on the mushrooms or the filling could spill into the oil.  Arrange the Mushrooms In a tray/ plate and decorate with cheese shreddings. sprinkle some chat masala and the Mushroom Tikkas are ready to pop in. Enjoy. Bon Appetit.

STEPWISE RECIPE FOLLOWS:

  1. Assemble all ingredients for the filling, batter and Mushrooms stalk removed.

2. For the filling crumble the paneer. Heat a karahi, pour oil and heat. Put in the green chillies, turmeric, and the mushroom stalks and fry on high heat until mushrooms release water and become dry again. now add the crumbled paneer and all the dry spices, and mix well. Add the finely chopped fresh coriander and put off the stove. allow the mixture to cool.

3. For the batter take the curd in a dish and add all dry spices mentioned in ingredients, add salt, and mix. Add the gram flour/ Besan little by little until you have a thick batter. 

4. Fill the mushroom caps with the filling and set aside. Now coat each mushroom well with the batter. Place them Filling side facing up in a tray.

5. To bake them preheat oven to 180 degrees, grease a tray and arrange the mushrooms, filling side up and bake at 180 degrees for approximately 30 mins. Midway turn around the mushrooms and continue to bake until they are done. They will turn golden brown.


You can also cook them on a Tava or deep fry them. The method is mentioned above. I have baked them in this recipe.  

Notes: 

1. If the mushrooms are large, it's better so that you can fill them up well.
2. This recipe is good to prepare ahead and bake or fry just before serving.
3. In case you prepare it ahead, then keep them refrigerated until half an hour to serve. From the refrigerator, they can directly be popped into the oven.
4. Serve it as a snack with some green chutney or as a starter with mint curd dip.
5. Garnish with grated cheese. 

 
If you tried this recipe and liked it please comment below. I would love to hear from you. 
 

Arbi Masala( spicy colacassia)

A simple everyday subji.  I make the Arbi/Arvi as a roast, sometimes a simple fry and it can also be added while making Sambhar or Kadi. This tuber is a little slimy, but that can be managed by dusting the Arbi with a little Besan/ Gram flour or rice flour. In this recipe, I have pre-cooked the Arbi in a pressure cooker and then baked it for the extra crispiness. You can also deep fry it. I do that quite often too. Let's get to the recipe right away.

PREP TIME: 10Mins                                COOK TIME: 40Mins
TOTAL TIME: 50 Mins                               COURSE:  MAIN 
 CUISINE: SOUTH INDIAN                       SERVINGS: 4

                                                                  AUTHOR: RAJNI RAM 
  
                                                           
Ingredients:
Arbi/Colaccasia 250 gm( boiled and skin peeled)
Onions 2 roughly chopped
Tomatoes 2 large finely chopped
Green chilli 2 chopped
Fresh coriander 1 tbsp finely chopped
Salt to taste
Red chilli powder 1 tsp
Coriander powder 1.5 tsp
Fennel powder(optional) 1 tsp
Garam masala powder 1/2 tsp
oil for frying and making the masala.
Cumin 1 tsp
Curry leaves a few

Directions:
Boil the Arbi in a pressure cooker, with a little salt for 2 whistles. Stick to 2 whistles or it will turn soggy and lose the crispness in the subji. Cool it, Peel the skin cut it into medium size pieces( if very small, use as it is), and set aside. To deep-fry, take oil in a Karahi and heat it. drop the cut Arbi gently into the oil and fry until they are a nice brown and crisp. 
If baking, then place them on a greased tray, drizzle a little oil over them, or you could use a brush to apply the oil and bake at 180 degrees for half an hour, turning over the Arbi midway, say around 15 mins. Bake until brown and crisp. Set aside.
Now in a pan or Karahi heat 1 tbsp oil. Add the cumin and turmeric and add the green chilli and chopped onion to this and saute well. Fry them well, but don't get them brown. Now add in the tomatoes, salt, and all the dry spices. cook until the tomatoes break and release water and the mixture looks like a thick paste. Add the garam masala and fresh coriander and mix. Finally, add in the fried/baked Arbi and mix nicely, so that the masala paste coats it evenly. Serve hot with Parathas, Roti, or Dal Chawal.   

STEPWISE RECIPE FOLLOWS 
1. Assemble all ingredients. Cook Arbi in a pressure cooker for 2 whistles. cool. Peel skin, cut into cubes, and set aside.

2. Fry the cooked and cut Arbi in oil or bake in the oven at 180 degrees for 1/2 an hour. They should be nicely browned and crisp.

3. In a pan or karahi heat oil. Add the cumin and turmeric powder. Add in the green chillies and onion and fry well.

4. Add the tomatoes, salt, and all dry spices mentioned under ingredients. Saute the mixture well. The tomatoes should become soft and the mixture should resemble a semi-dry paste. 

5. Add in the garam masala and chopped coriander and finally add the fried/baked Arbi and give a good stir. The masala paste should coat all the Arbi's well. Sprinkle some more chopped coriander and we are ready to serve. 

6. Serve with Rotis, Parathas, or just Dal Chawal. Enjoy. Bon Appetit.

Notes: 1. Amchur/ dry mango powder can be used along with other dry masalas if you prefer a little more tanginess. I have not added as I almost always use the country tomatoes/desi tomatoes/Naatu thakkali. They are naturally sour than the hybrid tomatoes or the Bangalore ones.
2. A little gram flour can be mixed with the dry spices and sprinkled over the Arbi before frying them. I have added besan as the Arbi is going to be mixed into  the paste, and so will not taste bland. 

If you tried this recipe and liked it please comment below. I would love to hear from you. 


Savoury Muffins

These Muffins are so buttery and cheesy with a melt in the mouth texture. They taste almost like a Quiche and are very simple to make. You can mix in vegetables if you want, I have just kept them plain. They are a great option for snack time or good to go in children's snack boxes. They keep good up to a week in the refrigerator. I have used plain flour/ Maida here, but as I mentioned earlier that I'm partial to wheat flour, I will be trying these muffins with wheat flour soon and blog the result with the recipe. In the meanwhile let's get to the recipe right away.

 PREP TIME: 20 Mins                                COOK TIME: 35Mins
 TOTAL TIME: 55 Mins                               COURSE:  SNACK
 CUISINE: WORLD                                     SERVINGS: 4

                                                                   AUTHOR: Rajni Ram 

Ingredients:

Plain flour 2 Cups
Baking powder 1.5 tsp
baking soda 1/2 tsp
Cheddar cheese 1.5 cups
Egg 1
Curd/yogurt 1/4 cup 
Milk 1 cup
Refined oil 1/4 cup
Garlic clove 3 crushed 
Butter 2 Tbsp
salt as per taste( remember the cheese has salt too)
Black pepper powder 1/2 tsp
Chilli flakes 1/2 tsp
Coriander leaves finely chopped or Parsley 1 Tbsp

Directions: 
Crush the garlic, put in a microwave-safe bowl or a small pan. Add the butter to this and melt in microwave/ stove. With this butter garlic mixture brush the muffin tins and keep ready. Reserve some butter- garlic mixture for brushing the muffin tops. Preheat oven to 180 degrees while you make the muffin batter.

In a dish put in the milk, egg, curd, and oil, and mix well. Don't beat or whip it. Just stir well and make it a homogenous mixture. In another dish mix all the dry ingredients- the flour, baking powder, baking soda, salt, chilli flakes, black pepper powder and mix them all together well. Add these dry ingredients into the wet ingredients, little by little. Add the finely chopped coriander/parsley. Finally, mix in the cheddar cheese. Don't mix in the cheese vigorously, just fold it in with very light hands. Now in they go into the muffin tin( I have used silicone muffin cups). Brush the muffin tops with the butter- garlic mixture. Your oven should be hot by now. Place the muffin cups/tins in the oven and bake at 180 degrees for 25 to 30 minutes. Test for doneness by pricking with a toothpick in the center of the muffin. If it comes out clean, remove the muffins and allow to cool completely.

STEPWISE RECIPE FOLLOWS:   

1. Assemble all ingredients.

2. In a microwave-safe dish put in the crushed garlic and butter and melt or put it in a small pan and melt over the stove. Grease the muffin cups with this mixture.

3. Preheat oven at 180 degrees.

4. Mix all the wet ingredients in a dish- milk, egg, curd/yogurt, oil. Combine well and make it a homogenous mixture.

5. Mix all dry ingredients in another dish- flour, baking powder, baking soda, salt, red chilli flakes, black pepper powder. Mix them well and add them to the wet mixture, little by little.

6. Mix nicely with light hands. Finally, add in the cheese and gently fold it in. Scoop the mixture in a spoon and fill in the muffin cups. Brush the muffin tops with butter garlic mixture.

7. Bake in a preheated oven at 180 degrees for 25 to 30 minutes. Check for doneness by inserting a toothpick in the center of the muffin. If it comes out clean remove the muffins and cool completely. If a little undone, bake for a few more minutes. 


NOTES:
1. Feel free to add vegetables of your choice to the muffin dough, I have not added any as I love the cheesy taste.
2. Cheddar cheese is recommended as Mozzarella doesn't add much flavor to the muffin.
3. These muffins stay good up to a month in the refrigerator and are a healthy option for kids' lunch boxes. Just warm them up and they are good to pack.


Pineapple Jam Tart

Initially, my experiments with baking always meant baking a cake and being happy with just that. Well, then the baking bug caught on and  I am experimenting with different kinds of bakes. I found baking tarts to be easy if your measurements and procedure are accurate. I'm a fan of Sally's Baking addiction and All recipes(for baking).


     PREP TIME: 15                                    COOK TIME:30Mins( + 2 HRS BAKE + CHILL)
    TOTAL TIME:60 MINS                          COURSE:  DESSERT
    CUISINE:  WORLD                               SERVINGS: 12 PIECES
    AUTHOR: Rajni Ram


Ingredients for Tart:

Plain flour/ Maida 1.5 cups
Butter 60 gms( chilled), or 1/2 cup
Fresh cream 1Tbsp
Sugar 2 Tbsp powdered
Egg yolk 1
Salt 1/2 tsp

Filling for Pineapple Tart:

Pineapple Preserve about 3/4 bottle of 320 gm jar
Blueberries about 10 to 15 (seeds removed ) 

DIRECTIONS TO MAKE DOUGH:
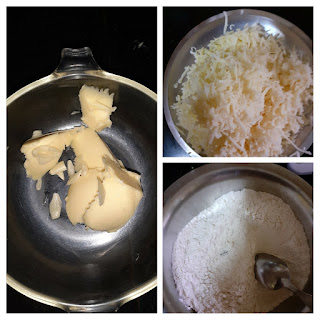
 Take the flour and powdered sugar in a dish and add the butter right from the refrigerator. Use your fingertips to rub the butter into the flour, the mixture should resemble crumbs, now add in the egg yolk, cream and combine to form a dough. 
1. If making chocolate tart base mix 1 Tbsp Drinking chocolate powder to the above dough and combine well.  
2. If making plain Tart shells carry on with the above dough without adding chocolate powder.
Once the dough is ready, wrap in a cling film tightly and cool in the refrigerator for at least an hour.
After an hour the dough is ready to be worked on. Grease cupcake tins if making tartlets, or grease a pie tin if making a single tart. Preheat oven at 180 degrees.

DIRECTIONS TO BAKE THE TART:
Take the plain dough, roll it into a big circle,  neither too thin nor too thick. Gently collect the rolled dough in the rolling pin and place it in the greased pie dish. Spread the edges along the side of the pie dish and pat evenly. Prick the entire tart with a fork so that the dough doesn't puff while baking. Fill the Tart with Pineapple conserve or Jam( I prefer the conserve as its low on sugar). Place the deseeded blueberries on the filling, put the pie dish in the preheated oven, and bake at 180 degrees for 30 minutes. After 30 minutes, bring out the tart from the oven carefully, cool fully, and put in the refrigerator for about 2 hrs to chill and set. The Pineapple Tart is ready to dig in. Bon Appetit. 

STEPWISE RECIPE FOLLOWS: 
 1. Assemble all ingredients.

2. Take a dish and put in the flour, sugar powder, salt, and butter. Rub in the butter into the flour until it resembles crumbs. When you hold the dough tight in your fist, it should hold shape. At this stage mix in the egg yolk and cream and combine to form a dough. There is no need for water in this dough.

3. Wrap the dough in a cling wrap and put it in the refrigerator for an hour.


4. Preheat the oven to 180 degrees. Remove the dough from the refrigerator and roll it out into a big circle, grease a pie dish and place the rolled out dough into the pie dish gently and press the edges and the center. 


5. Using a fork prick both the doughs completely, so that they don't puff up while baking. 


6. For Pineapple Jam filling set 3/4 of a bottle of Pineapple preserve/Jam aside, and deseeded Blueberries too.

7. Fill in the Pineapple preserve into the tart shell, and decorate it with Blueberries.


8. Put the Tart into the preheated oven and bake them for 25 to 30 minutes.

9. The pineapple tart has to be put in the refrigerator for 2 hours after cooling completely so that it sets. The chocolate tarts need not be chilled.

10. The pineapple tart is ready to serve.  


NOTES: 
1. I haven't blind baked the tart, as the filling needed to cook too.
2. The butter should be chill, so as to get a flaky crust. so use it straight from the refrigerator.
3. The same crust recipe can be used for blind baking if the filling is precooked and doesn't involve baking again.

MINT/PUDINA RAITA


Mint by itself is such a flavourful herb, it heightens the taste of everything else. Since it has a strong flavour it should be used in moderation. Here I have made a Raita(curd sauce) with Mint, which goes well with Parathas, Naans, Kebabs and with any mixed rice variety. The lovely green colour and the minty freshness gets the salivary buds in action. This is a simple recipe and takes under 7 minutes to make if you have all ingredients ready.
Well, one may think why am I blogging something so simple, something that anyone can make. Well, its just to establish the fact that something as simple as a well made Raita can lift the effect of a recipe gone wrong. People trying their hand at cooking for the first time will be encouraged by its simplicity to try cooking more often.
Let's get to the recipe right away.

PREP TIME: 10 Mins                             COOK TIME: 5 Mins
TOTAL TIME: 15Mins                            COURSE:  MAIN 
CUISINE: SOUTH INDIAN/                    SERVINGS: 4
                 NORTH INDIAN 

 Ingredients:                                                   Author: Rajni Ram

Mint leaves 1/2 a bunch
Green chilli 1(if not hot enough can add one more)
Curd 400 gms
Roasted Jeera powder 1/2 tsp
Salt as per taste.

Directions:
Wash the Mint leaves well and let the water drain. Smoothen the curd( do not beat or whip). Put the Mint leaves, Green chillies, roasted Jeera powder and salt in a blender and give it a good spin. Add about a cup of curd from the 400 gms to the blender and grind to a smooth paste. Now add this paste to the remaining curd and mix well. Put it in the refrigerator until ready to serve. Enjoy the Mint Raita with your meal. Bon Appetit.

STEPWISE RECIPE FOLLOWS:
1. Assemble all ingredients. Wash Mint leaves and drain the water.

2. Put the mint leaves(you can put the tender stems too), green chillies, roasted Jeera powder and salt in a blender and blend.


3. Now add a cup of curd to the ground mix and give it a good spin. It should become a fine paste.

4. Add this paste to the remaining curd and mix well. The Mint Raita is ready. Put it in the refrigerator until ready to serve.


Notes:
1. You can temper the raita with mustard and jeera if you wish. I haven't done it, as I think the Mint by itself is enough.
2. You can add grated Cucumbers, Carrot or finely chopped onion or Boondi to this raita. 
3. This Raita can also be used to soak Dahi Vadas.


 If you tried this recipe and liked it, comment below. Would love to hear from you.

Flavoured Rice

A very simple yet flavourful rice. You can make it on the days when you want no masalas. Since there are no pungent spices this Rice goes well with a lot of accompaniments like dal fry, raita, Rajma, Choley and more. Flavoured rice and simple dal fry make for soul food. Let’s get to the recipe right away.

PREP TIME: 15Mins                             COOK TIME: 20 Mins
TOTAL TIME: 35 Mins                            COURSE:  MAIN 
CUISINE: NORTH INDIAN                     SERVINGS: 4

Ingredients: 

Basmathi rice 1 cup
Raisins( preferably black) around 10 
Cashewnuts around 6 to 8
Walnuts( broken)around  6 to 8
Almonds around 5
Cloves 5
Cinnamon 1 inch stick
Milk 1/4 cup
Saffron 2 pinches 
Ghee 2 tbsp
Onion 1 medium cut to thin slices

Directions: 
Soak the rice for 15 minutes, drain water and set aside. In a Karahi take ghee and heat. Add the dry nuts and raisins and fry until the nuts are light brown. Remove the nuts from the oil and add in the onion slices and fry until nicely browned. Remove them and set aside. Add little oil to the karahi and put in the whole masalas, fry until aromatic. Add 2 cups water and the milk along with saffron, add some salt and the dry fruits and boil. When it starts boiling transfer the soaked rice, cover and cook, keep stirring every now and then and cover and cook again until the rice is done. Takes about 15 minutes on low fire. Once done, put off the stove, add in the browned onions and mix well. Flavoured rice is ready to serve. Enjoy. Bone Appetite.

STEPWISE RECIPE FOLLOWS:
1. Assemble all ingredients. Soak the Basmathi rice for 15 minutes and drain water.


2. Heat the ghee in a karahi and add the nuts and raisins and fry. Remove when lightly browned. Add in the onion to the same ghee and fry them until they are well browned. Remove onions and set aside.

3. Add a little oil to the karahi and drop the whole masalas into it when hot. Fry until aromatic, add two cups water, the saffron soaked milk, fried nuts and salt and bring the water to a boil,

4. As it boils, transfer the soaked rice and mix well. Cover and cook for few minutes, stir in between and cover and cook again until done. Takes about 15 minutes for the rice to cook on low fire. The water should have evaporated completely.

5. Once done, put off the stove and add the browned onions, mix nicely and the flavoured rice is ready to serve. 

NOTES:

1. Other whole masalas like cardamom,  peppercorns, fennel, cumin etc have not been added on purpose, as then the Pulav taste will come in. This rice has a very subtle flavour.
2. Saffron is optional, but if added gives a good flavour to the dish.
3. Cook rice on low fire, as high heat cooking will evaporate the water fast and the rice won’t cook well and may remain raw.
4. Water to cook rice can be adjusted as per your preference, but rice must be grainy and not mushy.
5. I have numbered a few pictures to avoid confusion in steps.

If you made this recipe and liked it, please do comment below. I would love to hear from you.


LAUKI KADDU KE KOFTE

LAUKI-KADDU KOFTA'S(BOTTLE GOURD AND PUMPKIN KOFTAS)

Usually, these Koftas are made individually as either Lauki Koftas or Pumpkin Koftas. In a moment of experimentation, I thought why not combine the two, and I don't regret the result at all. The sweetness of the Pumpkin was well balanced by the Lauki, and I must say it was an ideal wedding between the two.

Let's get to the recipe right away.

PREP TIME: 20 Mins                             COOK TIME: 15Mins
TOTAL TIME: 35 Mins                            COURSE:  MAIN 
CUISINE: North Indian                            SERVINGS: 4

Ingredients for Koftas                              AUTHOR: Rajni Ram

Lauki( Bottle gourd) shredded 2 cups
Kaddu(Pumpkin) shredded 1 cup
Besan(Gram flour) 1/2 cup (You can add more Gram flour for tougher                                                       Koftas)
Coriander(dhania) powder 1.5 tsp
Turmeric powder 1tsp
Red chilli powder 1tsp
Salt as per taste
Green chillies 2 finely chopped
Ginger 1 inch piece finely chopped
Coriander leaves few sprigs finely chopped
Oil for frying Koftas


Ingredients for the gravy:

Onion 2 large chopped
Tomatoes 4 medium-sized chopped
Ginger garlic paste 1/2 tsp
Green chillies 2 
Cashewnuts 8-10
Salt as per taste  
Red chilli powder 1.tsp
Coriander(dhania) powder 2 tsp
Fennel(saunf) powder
Turmeric powder 1 tsp
Jeera/Cumin 1tsp
Elaichi/Cardamom 2-3 pods
Bay leaf(Tej patha) 1
Cloves 2
Garam Masala Powder 1/2 tsp 
Oil for deep frying Koftas
1 Tbsp oil for sauteing the onions and tomato
Cream 1 Tbsp(optional)  

Method for making Koftas:

Combine the grated Lauki and Pumpkin and add all the dry ingredients including the Besan. The moisture in the vegetables is enough for formating the Koftas. Try not to add any water. Heat oil in a Karahi and when hot, reduce the flame to medium and drop the batter with a spoon, or shape them with hand and drop it in oil carefully. Fry until golden brown and repeat the same for all the batter. Put the fried koftas on absorbent paper for the oil to blot. Set aside. 

Method for gravy: 
In a Karahi take 1 tbsp oil and heat it. Add all whole masalas one by one, fry for a minute and add onion and saute until a nice brown, add the Tomatoes, cashew nuts, and salt and saute further until the tomatoes turn mushy. 
Cool the onion-tomato mixture and grind it in a processor until smooth.
In the same Karahi add 1 Tbsp oil and heat, pour the paste when the oil is hot, and stir nicely. Add all the powdered spices and mix well. Cook until oil is released. Now add 1 cup water, adjust consistency, and let it boil. When it starts getting thick again, sprinkle the Garam masala and put off the stove and add the cream(this step is totally optional). To serve arrange the Koftas in a dish and pour the prepared gravy over it, decorate with finely chopped coriander leaves and enjoy with Rotis, Chapati, Naan, Phulkas.
Bon Appetite!

STEPWISE RECIPE FOR KOFTAS FOLLOWS:


1. Assemble ingredients.


2. To the grated Lauki and Kaddu add salt followed by all the spice powders mentioned in Kofta Ingredients.
Add the Besan/ Gram flour too and combine nicely. Don't add any water, the moisture in the vegetables will do.


3. Heat oil in a Karahi, shape the Koftas or drop them with a spoon carefully into the oil and fry them to a golden colour. 


4. Put them on an absorbent paper and keep aside.

STEPWISE RECIPE FOR GRAVY FOLLOWS.

1. Heat oil in a Karahi and add Jeera/ Cumin. As they splutter add the chopped onions and ginger-garlic paste. ( you can add the whole spices too in the oil if you don't want to chew on them while eating) . Add the 2 whole chillies too.

2. Saute well until the Onions start turning brown and add the chopped Tomatoes and Cashewnuts to this. Stir well and cook until Tomatoes break and turn mushy. Leave to cool.
Transfer to a blender and puree it.
3. Now take 1 Tbsp oil in a karahi and add the Jeera and whole spices mentioned in Gravy preparation.
( please don't add again if you had while sauteing the Onion tomato mixture). Once they turn aromatic put in the onion-tomato puree and stir well. Keep stirring for a few minutes. 

4. Stir the gravy nicely and add all the spice powders mentioned in the Gravy ingredients. Cook for 2 mins and add 1.5 cups of water. Let it come to a boil and the gravy will start thickening. At this stage add Garam masala powder and put off the stove. Add the cream now and give a gentle stir( this step is optional).
5. Assembly of Koftas and Gravy-  In a flat dish arrange the Koftas and pour the gravy over them. Decorate with finely chopped coriander leaves and serve with Rotis, Phulkas, Naan. 
I have served them with hot phulkas. 

NOTES: 1. The moisture in the vegetables is enough for forming the Koftas.
2. If you choose to add the whole spices to the onion-tomato mix, you can consider straining the puree, to get rid of any unground spice.
3. If you are adding all whole-spices together to the oil directly, after making the gravy you can fish them out with a spoon if you don't want to chew on them.

If you try out this recipe, please comment below. I would love to hear from you.  

TOFU AND STIR FRIED VEGETABLES IN HOT SCHEZWAN SAUCE

  Any Tofu lovers? I agree its an acquired taste,but going by the health benefits it has to offer, I try including it in my diet now and the...