Vegetarian cooking blog

Monday 6 July 2020

VEG KOTHU PAROTTA

This is a south Indian street food recipe, made form Parathas(called Parotta in the South) and sauteed vegetables in a spicy tomato base. The Parottas are shredded(minced)and added to the gravy and further stir-fried to a crispy flaky dish. There are many variations to this dish, but I am keeping it simple. This dish can be served with sauce or raita. Usually,  leftover parathas or chapatis can be used for making this dish. Store-bought Parathas can be used too. Let's get to the recipe. 

PREP TIME: 20 Mins                                       COOK TIME: 25Mins
TOTAL TIME: 45 Mins                                    COURSE:  MAIN 
CUISINE: SOUTH INDIAN                             SERVINGS: 4
                                                                            AUTHOR: Rajni Ram


Ingredients:

Parathas 5
Onion 2 medium diced and petals separated
Carrot 1 grated coarse
Capsicum 1 diced to cubes
Tomato 1 diced
Tomato puree 1 cup
Cashewnuts 10 
Cloves 4
Cinnamon 1 small stick
Green chillies 3 split lengthwise
ginger-garlic paste 1 tsp
Cumin seeds 1 tsp
Curry leaves few
Turmeric powder 1/2 tsp
Red chilli powder 1 tsp
Coriander powder 1 tsp
Biriyani masala(powder) 1.5 tsp
Garam masala 1/2 tsp
Salt as per taste
Oil for stir fry

Directions: 
If the Parathas are store-bought, heat them on the tava/girdle with a little oil, cooking both sides. Cool them and using kitchen scissors tear them to pieces or use your fingers to tear them into 1 inch long pieces. keep this aside. In a pan/ Karahi take 4 tsp oil, heat and add the cumin seeds. Put in the turmeric powder and drop the green chillies and curry leaves into the oil, followed by the onions and fry at high heat for 1 minute. Now add the capsicum and continue to fry on high heat. Add the carrot, reduce heat and fry for 30 seconds. Now add the tomatoes, fry for another 30 seconds and pour the tomato puree and give a good stir. Now add the masalas- coriander powder, red chilli powder, Biriyani masala and salt. Stir well and cook for a few minutes, grind the cashew nuts to a loose paste and add it to the gravy. Continue to cook until the gravy thickens and starts getting dry, add the garam masala powder and put off the heat and let the mixture cool a bit. After 5 minutes add in the minced paratha pieces, switch on the stove and mix the parathas well with the gravy. The gravy should coat all the pieces and not turn them soggy. While mixing keep mashing the paratha will a flat spatula so that the parathas can further get minced. Stop once you have a dry mixture. The Kothu Parotta is ready to serve. Tastes best when served immediately. Any variety of Raita is a good accompaniment for this. Enjoy. Bon Appetit.

STEPWISE RECIPE FOLLOWS:
1. Assemble all ingredients and cook the parathas ahead if store bough, as they have to cool.


2. Tear the parathas into 1-inch pieces.

3. In a pan/karahi take 4 tsp oil and heat. Put in the cumin seeds and allow to splutter. Add in the green chillies and curry leaves. Also add 3 Cloves and 1 small stick Cinnamon.


4. Add in the onions and saute at high heat. Add the ginger-garlic paste, put in the capsicum and continue to stir fry, follow up with carrots. Reduce heat.


5. Add the chopped tomatoes, fry for 30 seconds and the tomato puree. Stir and cook for a few minutes.


6. Add all the masalas(dry spice powders), add 2 tbsp water and continue to cook.


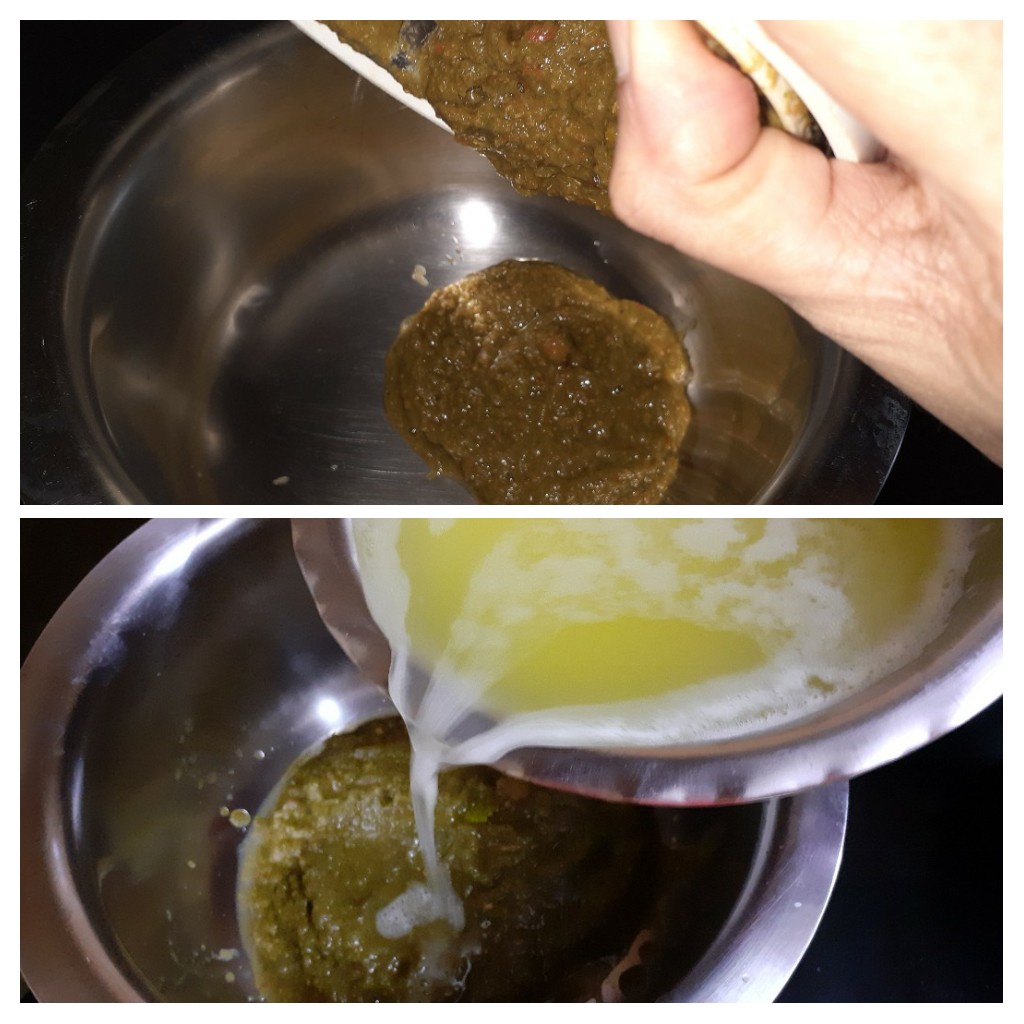
7. Powder the cashew nuts then add 2 tbsp water and grind them to a loose paste. Add this to the tomato gravy. Cook until the mixture thickens. the consistency should be like tomato sauce. Put off at this stage. Add chopped coriander and garam masala powder.

8. Let this cool for 5 minutes. Now add the paratha pieces and switch on the stove and mix the contents well. while mixing keep mashing the parathas with a flipper, so that they get minced further. When the paratha resembles a mince and the mixture is dry, put off the stove. the Kothu Paratha is now ready to serve.


NOTES:
1. The consistency of the gravy should neither be too thick nor too thin. It should resemble tomato sauce in consistency.
2. ou can other vegetables too if you like.
3. If you have ready-made biriyani mix paste you can use that too, but add a lesser quantity.
4. This recipe should be served immediately or else the paratha will turn chewy.
5. If you want to make it ahead, you can make the gravy ahead and add the paratha pieces just before you serve.

If you tried this recipe and liked it please do comment below. I would love to hear from you.


PINEAPPLE RASAM

Rasam is a popular South Indian dish prepared with tamarind, tomatoes, and Rasam powder. There are many variations of this dish, and each South Indian household has its own recipe for the proportions of the ingredients of the rasam powder. Therefore though Rasam is almost a regular feature in all South Indian households its taste is unique to each. No two Rasam recipes taste the same.

The following recipe has Pineapples along with tomatoes and is very flavourful. It makes for a good soup/ appetizer, for wintertime get-togethers. As you make the Pineapple Rasam the aroma of the pineapple fills the house and you'll have people at home making trips to the kitchen. The secret of a good Pineapple rasam rests in the extraction of the juice in 3 stages. Follow the recipe closely for instruction on juicing the Pineapples. Let's get to the recipe right away

PREP TIME: 20 Mins                                          COOK TIME: 20 Mins
TOTAL TIME: 35 Mins                                      COURSE:  MAIN / APPETISER
CUISINE: SOUTH INDIAN                               SERVINGS: 4
                                                                              AUTHOR: Rajni Ram


Ingredients:
Pineapple   3/4 of a medium-sized one
Tomatoes 2 medium chopped
Tuvar dal 1/2 cup( 1 cup= 150 gm)
Fresh coriander sprigs few
Green chilies 2
Ginger 1 inch piece
Fennel seeds 1 tsp
Turmeric powder 1/2 tsp
Rasam powder 3 tsp
Salt as per taste
Asafoetida 1 tsp
Mustard seeds 1 tsp
Roasted Pepper & Cumin powder 1 tsp( dry roast in the ratio 2:1 and grind coarse)
Curry leaves few
Ghee/ clarified butter for tempering
Sugar 2 tsp(optional)

Directions for Pineapple Juice:
Stage 1: chop the pineapples and put them in a liquidizer/juicer and extract juice. It should be a concentrate. Add no water at all at this stage. This is extract 1.
Stage 2: Add 1 to 1.5 cups of water and juice again to get the second extract.
Stage 3: Add 2 cups of water and juice again to get the 3rd extract. Strain the pulp at this stage into the 3rd extract and discard the fiber.

Directions for Pineapple Rasam:
 
Wash the Tuvar dal and pressure cook for 5 whistles, set aside. Now put the chopped tomatoes, coriander leaves, green chillies and ginger in a blender and puree them. Take a 1.5-litre vessel and pour this tomato coriander puree into it. Now add the 3rd extract juice to the above puree. Also add in the salt, Rasam powder, 1/2 tsp asafoetida, turmeric powder, and boil this mixture. Allow it to boil for some time until it reduces to 1/2( Please note that 3rd extract had 2 cups water so that plus the tomato puree, has to boil and reduce to half). At this stage add the cooked dal ( mash lightly) along with the water. If there is no water remaining in the dal add up to a cup to the dal, mix nicely and add to the reduced extract. Now add the 2nd extract juice and continue to boil. Boil until the rasam starts frothing in the vessel and starts brimming up. Keep stirring in between. Now add another 1.5 cups of plain water and continue to boil for another 2 minutes. Finally, add the 1st extract juice, 2 tsp sugar( optional), and put off the stove immediately. The rasam should not be allowed to boil after adding the first extract, as it will lose all flavour. Now temper the Rasam in ghee. Take 2 tsp ghee in a small tadka kadai and heat it. Add mustard seeds and as they crackle add the cumin-pepper powder, 1/2 tsp asafoetida, switch off the stove, and drop in the curry leaves. Pour the tempering into the rasam. Garnish with finely chopped fresh coriander leaves. The flavourful Pineapple Rasam is ready to serve. Serve it as an appetizer/soup or with rice for some yummy comfort food.  

STEPWISE RECIPE FOLLOWS:
1. Extract the Pineapple juice following the method mentioned above and keep ready.

2. Gather all other ingredients and keep ready.

3. In a blender put in the tomatoes, coriander leaves, green chilies, ginger, and fennel seeds and blend to a smooth puree.

4. Take a big vessel that can fit around 1.5 litres of liquid. Put the 3rd extract of juice into the vessel and add in the tomato puree. Switch on the stove. 

5. Add the salt, turmeric powder, asafoetida, Rasam powder, and boil. Continue to boil until it reduces to 1/2 the quantity.

6. Now add the cooked dal along with the water into the boiling soup and also add the 2nd extract juice now. Continue to boil until it froths and begins rising. Keep heat at medium throughout.

7. Now add another 1.5 cups of plain water and continue to boil. When it brims up, add the 1st extract juice, add sugar(optional) and put off the stove immediately. Avoid boiling the Rasam once you add the 1st extract as flavour will be lost.


8. Now in a small tempering pan/tadka kadai,  add 2 tsp ghee and heat. Add the mustard seeds, when they crackle, add the roasted pepper-cumin powder, asafoetida, and put off the stove. Finally, add the curry leaves to the tempering and pour the tempering into the Pineapple Rasam. Serve hot as a soup or along with hot rice and a dollop of ghee.


NOTES:
1. Follow instructions for Pineapple juice carefully as it affects the flavour of the Rasam.
2. You can increase or decrease the Rasam powder as per your spice preference. But don't go below 2 tsp for 1.5 litres of Rasam.
3. Sugar is optional, add only if the pineapples are not sweet enough.
4. The roasted cumin -pepper powder is common to all Rasam varieties. You can store this powder in an airtight jar to add to Rasam, Pongal, etc;  


Sunday 5 July 2020

BERRY SMOOTHIE ICECREAM

For all the Berry lovers like me, this Smoothie Icecream is a treat to the taste buds. Made with a mix of Blueberries and Cranberries, Greek yogurt, Hung Curd, and some condensed milk, this is a dessert full of flavour. What's more, it is healthy too...
Getting to the recipe right away.

PREP TIME: 15Mins+ 2hrs( hung curd)          PROCESSING TIME: 5 Mins 
TOTAL TIME: 35 Mins                                    COURSE:  DESSERT
CUISINE: WORLD                                           SERVINGS: 6
                                                                            AUTHOR: Rajni Ram

Ingredients:
Digestive biscuits 6 numbers
Condensed Milk 250 gm
Cranberries 100 gm
Blueberries 100 gm
Plain Greek yogurt 250 gm
Hung Curd 250 gm
Paper cups 6 
Icecream sticks 6

Directions :
Take the Digestive biscuits in a dry mixer and powder them. To this add 2 tbsp condensed milk and give another spin in the mixer. Distribute this mixture evenly into the 6 cups and press it down into the cup base with a spoon. Now put the berries into the dry mixer and give it a spin. Grind it coarse and keep aside. In a liquidizer pour the Condensed milk, followed by Greek yogurt and hung curd, mix in the coarsely ground berries and blitz them for a minute. Pour the mixture into the 6 cups filling 3/4 of the cup and insert the ice cream stick until it touches the biscuit base. Repeat for all cups and freeze them for 8 hrs. The Berry Smoothie Icecream is ready for an after-dinner treat. Enjoy. Bon Appetit. 

STEPWISE RECIPE FOLLOWS:
1. Assemble are ingredients. Keep the paper cups and icecream sticks ready.

2. In the dry mixer put in the Digestive biscuits and powder them. Add 2 tbsp Condensed milk and spin in the mixer again.  

3. Distribute evenly in the 6 cups and press it down to the cup base. Keep aside.

4. Put the Berries in the dry mixer and coarsely grind them. Keep aside.

5. Now in the liquidizer pour the Condensed milk, Greek yogurt, and hung curd, followed by the berries and blitz the contents for a minute.

6. Distribute evenly into the 6 cups and insert the icecream sticks such that they touch the biscuit base. Put the cups into the freezer to set for 8 hrs.

7. After 8 hrs remove from freezer and unmould the Smoothie Icecream by gently squeezing the cup from the base until the icecream slides out.


I tried this recipe yesterday with fresh Strawberry, as it's the Berry season now in India and the Berry Smoothie ice cream turned out very delicious with the fresh ones. I have used 2 packs of strawberries around 300 gms, rest of the measurements and recipe remain the same. Try it out this season and make the best of the goodness the berries have to offer.


NOTES:
1. Any mix of berries can be used. 
2. I have used dry berries, you can use the fresh ones too in the season, but you will have to add sugar to the mixture as the berries can be a little sour. That said the fresh berries do give a more intense flavour.
3. The base is a little hard when set, but the base cannot be done away with, as the base allows for an easier unmoulding of the icecream. 
4. You can use 2 tsp chilled butter instead of the condensed milk to set the digestive biscuit base. It might turn out a little softer than the condensed milk one. I have not tried this in this recipe.
5. As you can see fresh berries to dried berries the colour does make a difference. Taste and flavour are the same. But then fresh berries are irresistible to me .🙂

If you make this recipe and like it pls comment below. I would love to hear from you.
 

Saturday 4 July 2020

PAKODE WALI DAL


Last week I made some Pakodas to go with Kadi(More kozhambu). I had some left after lunch, so saved them for dinner. I had made Dal that night and happened to add those Pakodas to Dal, and the result was rather unique and tasty. After some research on the internet for similar recipes, I realized that I couldn't find anything that combined Dal and Pakoda. Hence, I thought I'd share my take on it with you.  In this recipe, deep-fried Onion Pakodas have been dunked in a flavourful Dal. Let's get to the recipe right away.

 PREP TIME: 20 Mins                                         COOK TIME: 15 Mins
 TOTAL TIME: 35 Mins                                      COURSE:  MAIN 
 CUISINE: SOUTH INDIAN                              SERVINGS: 4
                                                                              AUTHOR: Rajni Ram


Ingredients for the Dal:
 
Tuvar Dal(yellow lentils) 1 cup( pressure cooked)
Moong dal 1/2 cup (pressure cooked)
Spring onion greens(optional) finely chopped 1/2 cup
Tomato 1 medium
Green chilli 2 finely chopped
Asafoetida 1/2 tsp
Ginger- garlic paste 1 tsp
Red chilli powder 1 tsp
Turmeric powder
Garam masala 1/2 tsp 
Lemon juice 2tsp
Salt as per taste
Mustard seeds 1 tsp
Cumin 1 tsp
Oil for tempering

Ingredients for the Pakodas:

Onion 1 large or 2 medium roughly chopped
spring onion greens(optional) 1/2 cup
Besan/ gram flour 1 cup
Rice flour 1 cup
Ajwain/carrom seeds 1/2 tsp
Asafoetida 1 tsp
Green chilli 2 finely chopped
Red chilli powder 1 tsp
Salt as per taste
water for making batter 1 cup approx.
Oil for frying
 
Directions for Pakodas:
Take the Onions and spring onion greens in a dish and add the Besan and Rice flour followed by all dry masalas and mix well. Do not add water immediately. Start mixing the mixture, the onion will release some moisture, depending on that the water can be added a little at a time. We do not want a runny batter, it should be slightly dry, you should be able to form a lump with it. Now heat some oil in a Karahi for frying the pakodas. When the oil is quite hot, pour about 1 tbsp hot oil into the pakoda batter. This gives crispy pakodas. Mix with a spoon/ladle after adding the hot oil and now start dropping bits of the batter very gently into the oil to make Pakodas. Drain the oil from pakodas on absorbent paper and set aside. 

Directions for dal:
In a pan heat some oil. Add mustard seeds and as they crackle add the cumin seeds, turmeric and green chillies. Fry well. Now add the asafoetida and the finely chopped spring onion greens and saute. After a minute add the chopped tomatoes, salt and all the spice powders, except garam masala. Cook for a few minutes. The tomatoes should turn mushy. Now add in the cooked dals and mix well. Add about 2 cups water to the dal and bring to a boil. Put off the stove and add the lemon juice now. The Dal Tadka is ready. Garnish with some chopped coriander.

To plate, put the dal in a Katori/cup and drop in the pakodas just before you serve, or you can even arrange the pakodas in a dish and pour the hot dal over it. Serve immediately if doing this. Pakode Wali Dal is ready to serve. Enjoy. Bon Appetit.

STEPWISE RECIPE FOLLOWS:
1. Assemble all ingredients. Mix both Dals together and pressure for 5 whistles.

2. In a dish put in the Onions, spring onion greens, green chillies and all the dry spices mentioned under ingredients for pakodas add salt and mix well.

3. Now add water a little at a time to form a little lumpy batter. Heat oil in a karahi and when it is quite hot add 1 tbsp of the oil into the pakoda batter.

4. Start dropping small portions of the pakoda batter into the oil, a few at a time. Drain pakodas on absorbent paper.

5. In a pan heat some oil and add the mustard seeds. When they crackle add the cumin and green chillies and fry. Now add the spring onion greens and tomatoes and cook for a minute. Add salt and other spices mentioned under dal ingredients, except Garam masala and lemon juice.


6. When the tomatoes get mushy, add the cooked dal and stir well. Now add 2 cups water and bring the dal to a boil. Put off the stove and add the lemon juice and the garam masala and stir. Garnish with coriander leaves. The Dal Tadka is ready.

7. To plate the Pakode Wali Dal, pour the Dal into a bowl and add in the fried Pakodas just before serving. This recipe goes well with and all Indian breads.


NOTES:
1. The Pakodas can be of your choice-Onion/ Spinach.
2. Don't skip the step of adding hot oil to the pakoda batter, it makes the pakodas crisp on the outside and soft inside. Some people add cooking sods for the same, but I recommend this option.
3. The dal too can be of any variety.
4. The spring onion is optional, the dal and pakodas will taste just as fine without them. I love making dal with spring onion when in season as it gives a nice flavour to the dal.
5. These pakodas can be had as a snack too with some tomato sauce or green chutney, so do save some to munch on.

If you made this recipe and liked it please comment below, I would love to hear from you.

Friday 3 July 2020

SABUT MOONG DAL/ GREEN MOONG DAL

 This is  a wholesome dal for the days you want a simple yet nutritious meal. It is ideal for those days you want to be off masala's and give your taste buds a break. I have kept the dal very simple. With a little planning ahead(soaking the dal), you can get this done in just 30 minutes. After a busy day at work, when you want to spend minimum time in the kitchen, just soak the lentils before you leave home for work.  Once back, 10 minutes in the cooker, 10 minutes for the pressure to settle, and 10 minutes to temper the dal, and it's done. Side by side cook rice and you can have a wholesome dinner. Those 10 minutes for the pressure to settle can be put to good use, brew yourself some tea and just chop an onion and some tomatoes and we are ready to temper the dal. Let's get to some wholesome goodness. 

 PREP TIME: 5Mins +soak time( 4 hrs)                     COOK TIME: 30 Mins
 TOTAL TIME: 35 Mins                                              COURSE:  MAIN 
CUISINE: NORTH INDIAN                                       SERVINGS: 4
                                                                                  AUTHOR: Rajni Ram


Ingredients:
Green Moong(lentils) 1 cup soaked at least 4 hrs
Onion 1 small
Tomatoes 2 pureed
Cinnamon 1 small stick
Cumin 1 tsp
Ginger garlic paste 1 tsp
Red chilli powder 1 tsp
Turmeric powder 1/2 tsp
Amchur/dry mango powder 1/2 tsp
Coriander powder 2 tsp
Garam masala powder 1/2 tsp
Coriander leaves 2 tsp finely chopped
Oil for tempering

Directions:
Cook Moong dal/lentils with 1 piece Cinnamon stick for 5 whistles. Wait for the pressure to release. While you wait, cut 1 small onion finely and puree 2 tomatoes in the blender. In a karahi heat 2 tsp oil. Add the cumin seeds and let them crackle. Put in the onion and fry nicely for a minute. Now add the ginger-garlic paste and continue to fry. When the onion starts turning light brown add in the tomato puree, cook for 1 minute, and add in the cooked Moong dal. Stir well and add salt followed by all the spice powders except garam masala. Simmer for 5 minutes, add in the garam masala and turn off the stove. Garnish with finely chopped coriander leaves. Simple and flavourful Hari Moong ki Dal is ready to serve. Enjoy. Bon Appetit.

STEPWISE RECIPE FOLLOWS:

1. Assemble all ingredients. Soak the Green Moong for 4 hours at least.


2. Pressure cook the dal for 5 whistles.


3. Take oil in a karahi and heat. Add the cumin seeds and allow to splutter. Add the turmeric powder and the chopped onion.

4. Fry nicely, until the onion starts turning slightly brown. Now add in the ginger-garlic paste. Fry for a minute and add the tomato puree. Cook for a minute.


5. Add in the spice powders, except garam masala, followed by the cooked dal.


6. Add one cup of water( add more if required to adjust consistency. Stir well and allow to simmer for 5 minutes.  Add in the garam masala now and switch off the stove. Garnish with coriander leaves and the Green Moong dal is ready to serve. 

It goes well with Roti and Rice varieties.


NOTES:
1. Tomatoes can be chopped and added too instead of pureeing, but in this recipe particularly I prefer to add the pure, as the Green moong is a little bland and the pureed tomatoes impart a little sourness to the dish than chopped and cooked ones. 
2. If you don't give much soak time, you can still make the dal, but with a longer pressure cooking time.

Thursday 2 July 2020

GUTTI VANKAYA KURA( Baby Brinjals In Gravy)

Brinjal/Eggplant, a vegetable so versatile that a number of recipes can be made/created with it. Gutti Vakaya Kura is a speciality from the Andhra region in South India. Baby brinjals simmered in a peanut sauce. There are many ways of making this dish. Sometimes it is made with gravy, like this recipe or is stuffed and roasted. I prefer the gravy version for the taste of peanuts and the tartness of the tamarind. Baby brinjals are the preferred variety for this recipe. Let's get to the recipe right away.

  PREP TIME: 20 Mins                                  COOK TIME: 30 Mins
 TOTAL TIME: 50 Mins                                COURSE:  MAIN 
 CUISINE: SOUTH INDIAN                         SERVINGS: 4


Ingredients:

Baby brinjals 400 gm 
Turmeric powder 2 tsp (split)
Salt as per taste
Red chilli powder 3 tsp(split)
Oil for roasting and tempering
Mustard seeds 1 tsp
Curry leaves a few
Jaggery a small bit(optional)

For paste
Peanuts/ groundnuts 2 tbsp
Coriander seeds 1 tbsp
Ginger 1 inch piece
Garlic around 6 pods
White Sesame 2 tsp
Green chilli 2
Grated coconut 1 tbsp
Tamarind 1 lemon sized ball( deseeded)

Directions: Slit the baby Brinjals midway into a cross. Keep the green stalk intact and do not cut it away.  Mix1tsp turmeric powder, salt, and 2 tsp chilli powder. Apply a little of this powder inside each brinjal and set aside. Roast all the ingredients mentioned under paste in 1 tsp oil and allow it to cool. Once cool, grind them to a fine paste in a blender. Now in a Karahi or pan heat 1 tbsp oil, put in the brinjals a few at a time and roast for few minutes( approx 5 min). The brinjals should not turn limp but should start getting s little soft. They will start changing colour to brown. At this stage remove them from the pan and set aside. In the same pan/karahi take 1 tbsp oil and heat. add in the mustard seeds and as they crackle add the curry leaves and turmeric powder. fry for 30 seconds and add the ground peanut paste to the oil and stir continuously. Reduce flame before adding the paste, as the paste can stick to the pan. Add salt, red chilli powder( only if you need more spice, remember we have already added green and red chilli to the paste). Fry the paste nicely for 2 minutes. The raw taste of the peanuts must not remain. At this stage add 2 cups water and drop the baby brinjals into the sauce. Add the jaggery at this stage if you are using it( this is optional). Cover and simmer on low fire for 15 minutes. Open the lid and stir the contents every now and then. At the end of 15 minutes, the sauce should have reduced and the brinjals should have cooked, but yet stiff. The spicy Gutti Vankaya Kura is ready to serve. This dish goes well will Pulav, vegetable rice(Brinji), or even Roti, Parathas and other bread. Enjoy. Bon Appetit.

STEPWISE RECIPE FOLLOWS:
1. Assemble all ingredients.


2. Slit the Baby Brinjals midway as shown in the picture. Mix 1 tsp turmeric powder, 2 tsp red chilli powder and salt as per taste. Apply this powder into each brinjal. Set aside.

3. Take 1 tsp oil in a karahi and fry all ingredients mentioned under paste. Cool it and grind to a smooth paste.

4. In the same karahi take 1 tbsp oil and roast the brinjals a few at a time. They should change colour and get a little tender, but not limp. Remove from the karahi and set aside.

5. In the same karahi add another tablespoon oil and heat. Put in the mustard seeds and curry leaves. as the mustard splutters add the turmeric powder and fry for 1/2 a minute.

6. Now add the ground paste and stir constantly and don't allow it to stick to the pan. Fry for 2 minutes and add salt, red chilli powder( only if you want it spicier)and continue frying. The raw taste of the peanuts should subside.

7. Now add 2 cups of water and mix. Drop the brinjals slowly into the sauce and cover and cook for 15 minutes, stirring in between every now and then. If using jaggery, add now.

8. When done, the sauce should have thickened, and the brinjals should have cooked and retained the shape. The Gutti Vankaya Kura is ready to serve.


NOTES:
1. Peanuts without the skin can be used. Skin need not be removed. 
2. Jaggery is usually used to break the complex proteins of the peanut. You can choose not to add. 
3. Do not cut the green stalk of the brinjal. It helps in retaining the shape after cooking. Some people love chewing on the cooked stalk. It tastes really good.
4. If you don't wish to roast the tamarind with the other paste ingredients, you can make pulp and add it while the sauce is simmering.


TOFU AND STIR FRIED VEGETABLES IN HOT SCHEZWAN SAUCE

  Any Tofu lovers? I agree its an acquired taste,but going by the health benefits it has to offer, I try including it in my diet now and the...