Vegetarian cooking blog

Thursday 17 September 2020

MOR KUZHAMBU (Vendakai)

 This is a popular south Indian dish made curd/yogurt and is the counterpart of the North Indian Kadi. In the North Indian Kadi chickpea flour or besan is used to give body to the dish, whereas in Mor Kuzhambu Chana dal and Tuvar dal( yellow lentils and gram) along with coconut are used to give body. The masalas used in Kadi are in powdered form, whereas in the South Indian Mor Kuzhambu the whole masalas are ground to a paste.

The array of vegetables that can be used in making this dish is huge. Vegetables like Plantains, Brinjal, Colaccasia/Arbi, Ash gourd, Pumpkin, Mango(ripe), Bhindi/Vendakai can be used to make this dish. These vegetables are used in a combination or individually to make the Mor Kuzhambu. 

I am giving the method to make Vendakai/Bhindi Mor Kuzhambu here as it is slightly different from the kuzhambu prepared with other vegetables. Here the Bhindi/Okra is sauteed or deep-fried before adding it to the Kuzhambu(gravy). Whereas other vegetables are cooked(boiled) before adding them to the gravy, therefore the process changes a little but not the masalas and other steps.

 While you are here please check out other recipes by me like Vatha Kozhambu, Gutti Vankaya Kura, Drumstick curry, Brinjal Pepper masala, and many more...

Here is the recipe of Mor Kuzhambu for you- 

PREP TIME: 15 MINS                                  COOK TIME: 20 Mins
TOTAL TIME: 35 Mins                                  COURSE:  MAIN 
CUISINE: SOUTH INDIAN                                         SERVINGS: 5
AUTHOR: Rajni Ram


Ingredients:

To Soak for 15 mins:

 Dhania/Coriander seeds 1 tbsp

Jeera 1/2 tsp

Chana dal 1.5 tsp

Tuvar dal 1 tsp

Dry red chilli  1

Methi seeds a pinch(optional)

To grind:

Green chilli 1 big

Ginger1/2 inch piece

Coconut 2 tbsp +

All soaked ingredients after draining water.

Curd 300 ml or 2 cups(refer method) (1 cup=150ml)

For tempering:

Bhindi/Okra/Ladysfinger around 6 to 8 cut 1 inch long

Salt a little

Oil 1 tbsp

Mustard seeds 1 tsp

Cumin seeds/Jeera 1/2 tsp

Dry red chillies 2 broken 

urad dal 1 tsp

Chana dal 1/2 tsp

Curry leaves a few

salt to taste


Directions:

Soak all ingredients mentioned under "to soak" for 15 minutes. After 15 minutes, drain water and put the soaked ingredients into a blender. Add the ingredients mentioned under "to grind" except the curd and grind them to a coarse mixture. Now add 2 tbsp curd to the coarse mixture and grind again to a smooth paste.

Now in a Kadai/Pan take oil for tempering. On heating add all ingredients mentioned under "to temper" except the Bhindi and fry for 30 seconds or until the dals turn light brown. Now add the bhindi and saute. Keep stirring every now and then so that the bindi doesn't stick to the pan. We want the bhindi to be crisp and cooked, but not mushy. Once the Bhindi is cooked transfer to a plate or vessel.

Now put the same Kadai on the flame and pour the ground paste into it. Reduce the flame and add 1 to 1.5 cups of water and simmer it. The paste has to cook well, for about 2 minutes or until the raw taste of the masalas is gone. Now smoothen the remaining curd(we used only 2 tbsp for the paste) with a whisk or give it a single spin in the blender and pour this curd into the cooking paste. Add turmeric powder and salt. The flame should be low throughout. Once the curd is poured, keep stirring constantly for a few minutes. This should take approximately 2 minutes and then switch off the flame. Once the curd is poured, it should not simmer for long. Now add the sauteed/fried bhindi and mix nicely. The tasty Mor Kuzhambu is ready to relish.


Serving Suggestions: Hot rice and Parupu Usili on the sides. It is a match made in heaven with Coconut(Thengai ) Sevai(rice hoopers) or even with Coconut rice.


STEPWISE RECIPE FOLLOWS:

1. Assemble all ingredients. Soak all ingredients mentioned under "to soak" for 15 minutes. After 15 minutes, drain water and put the soaked ingredients into a blender.


2. Add the ingredients mentioned under "to grind" except the curd and grind them to a coarse mixture. Now add 2 tbsp curd to the coarse mixture and grind again to a smooth paste.


3. Now in a Kadai/Pan take oil for tempering. On heating add all ingredients mentioned under "to temper" except the Bhindi and fry for 30 seconds or until the dals turn light brown. Now add the bhindi and saute. 


4. Keep stirring every now and then. Bhindi should be crisp and cooked, but not mushy. Once the Bhindi is cooked transfer to a plate or vessel. 


5. Now put the same Kadai on the flame and pour the ground paste into it. Reduce the flame and add 1 to 1.5 cups of water and simmer it. The paste has to cook well, for about 2 minutes or until the raw taste of the masalas is gone. 


6. Now smoothen the remaining curd(we used only 2 tbsp for the paste) with a whisk or give it a single spin in the blender and pour this curd into the cooking paste. Add turmeric powder and salt.


7. Once the curd is poured, keep stirring constantly for a few minutes, approx. 2 minutes and put off the flame. Now add the sauteed/fried Bhindi to the gravy. The yummy Mor Kuzhambu is ready. Enjoy with hot rice and ghee or Coconut rice.


Pineapple Mor Kuzhambu:

8. The Mor Kozhambu cam be made with the veggies I have mentioned about. Recently I tried this with Pineapples and they turned out very well. To make it with Pineapple, cut the pineapple into chunks, cook it first and then proceed with rest of the recipe. 


NOTES:

1. I have sauteed the Bhindi in this recipe, it can be deep-fried in little oil too.

2. The flame should always be low while cooking this dish, as curd on the high flame will split and the water will separate.

3. For the same reason once the curd is poured into the masala paste it has to be stirred constantly, to avoid separating of water and curd, which will turn the dish runny.  

4. Be liberal with the coconut as it gives body and flavour to the dish. 


Video on how to make Mor Kuzhambu here๐Ÿ‘‡


 If you tried this recipe and liked it please comment below. I would love to hear from you. If you have a query about the recipe email us and ill respond as soon as I can.
If you would like to receive our recipes in your mail please leave your mail id at the homepage. Every time Rajjo's Kitchen has a new post we will mail the recipe to you.


Monday 14 September 2020

HOMEMADE PESTO

 Pesto is a simple sauce made of fresh Basil leaves, Parmesan cheese, pine nuts, garlic, Olive oil, pepper, and salt. Other greens like Spinach or onion greens can also be used. Basil is fragrant and imparts a lot of flavour so is more commonly used. Pinenuts can also be substituted with other nuts like walnut, cashew nut, etc.

I make this Pesto sauce very frequently as I like using it as a dip for finger food, as a spread on toast, and thin it down a bit and use it as a sauce for pasta. This is a simple 5-minute recipe and needs no cooking. Along with the Basil leaves, I have added Onion greens also. This is optional.

The basil leaves I have used here are Italian Basil. The commonly available ones are Italian Basil and Thai Basil. In Tamil, these are called Vibuthi Pachai and are medicinal. 

While you are here also check out my Schezwan sauce recipe which is also a simple 5 minute one.

Here is the recipe for Pesto sauce for you. This does not have a stepwise recipe as it is a simple one.


PREP TIME: 5Mins                                      COOK TIME: 2 Mins
TOTAL TIME: 7 Mins                                COURSE:  SAUCE
CUISINE: WORLD FOOD                        QUANTITY: 100 GM APPROX
AUTHOR: Rajni Ram


Ingredients:

Basil leaves 1 cup 

garlic 3 to 5 cloves

Parmesan cheese 1/2 cup shredded

pepper 1tsp

salt as per taste

Cashew nuts 6 nos

Onion greens one handful finely chopped

Olive oil 1/4 cup or more


  Directions:

Put all the ingredients in a blender except the oil and grind to a coarse paste. Now add half the quantity of oil and blend again. A slightly grainy Pesto tastes better than a smooth one. After grinding transfer to a container and top up with the remaining Olive oil and store. Use as required. Add more oil if required. The green and flavourful sauce is ready.


NOTES:

1. Using other cheese like Cheddar will alter the taste a bit and the consistency will differ. Mozarella is not the preferred cheese for this recipe.

2. For that lovely green colour add other greens like blanched Spinach or Onion greens.

3. Be liberal with the olive oil, and use a good quality olive oil for better flavour.


If you tried this recipe and liked it please comment below. I would love to hear from you. If you have a query about the recipe email us and ill respond as soon as I can.

If you would like to receive our recipes in your mail please leave your mail id at the homepage. Every time Rajjo's Kitchen has a new post we will mail the recipe to you.


Saturday 12 September 2020

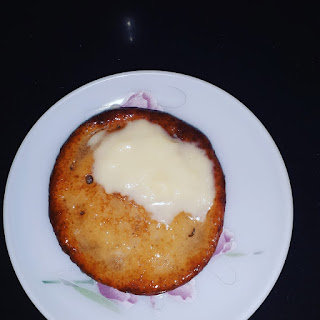
MALPUA WITH GULAB JAMUN MIX AND PANEER

 Malpua is a sweet dish close to my heart and I have taste both the Bengali version and the ones made in the north. I like both of them equally. My hands have been itching to try out this recipe that I thought of and scoured the internet to find if such a one exists. There are a hundred recipes of Malpua with Gulab Jamun mix, but what makes this one different is the use of Paneer(cottage cheese) and Wheat flour. Using Paneer makes the Malpuas soft and fluffy on the inside and wheat flour gives it a little crunch on the exterior.

This is the first time I'm trying out this version and I am happy that it turned out well. Sometimes our hunches do work, and this time the hunch was to use paneer with the mix. The Bengali version of Malpua uses Chenna or paneer along with refined flour though.

The sugar syrup here is a very thin one as it is only to keep the Malpuas moist. I have also made an instant Rabri, the recipe of which I am posting, but I am not uploading the pictures as I couldn't click any, since the Rabri here was made as an afterthought.

I have a Pineapple Rabri recipe here on the blog which you can refer to. This is the authentic way of making Rabri. Whereas what I have made with the Malpua is a shortcut one, which was made as an accompaniment with the Malpua.

While you are on this page please check out my other sweet/dessert recipes like      Apple cake, Carrot Kheer, Unni Appam, Blueberry Cheesecake, Maa Ladoo,          Berry Smoothie Icecream, and more...

Here is the recipe of Malpua from Gulab Jamun Mix-

PREP TIME: 10Mins                                      COOK TIME: 30 Mins
TOTAL TIME: 40Mins                                    COURSE: DESSERT/SWEET
CUISINE:   INDIAN                                        SERVINGS: 4
AUTHOR: Rajni Ram


Ingredients:

Gulab Jamun Mix 1 cup

Paneer 100 gm minced

wheat flour 1/2 cup

Sugar 1 tbsp( for batter)

Milk 1 cup (or more if required)

Sugar for syrup 1 cup

Water for sugar syrup 1/2 cup

Elaichi/green cardamom 2 pods

Fennel seeds 2 pinches

Oil for frying

Directions for making the batter:

In a bowl take the Gulab Jamun Mix. Mince the paneer in a blender and add it to the Gulab Jamun mix in the bowl, add the wheat flour followed by the 1 tablespoon sugar. Nicely mix them all together to a dry mixture. Now adding milk little by little whisk to form a pouring consistency batter( like dosa batter or a little thicker). Now add the fennel seeds to the batter and mix. 


Directions to make the sugar syrup:

In a pan/ flat vessel take one cup sugar, add 1/2 cup water, and put it on the flame. Stirring continuously so that the sugar dissolves, allow it to boil for 2 to 3 minutes, and put off the flame. String consistency of the syrup is not required in this recipe. Add 2 cardamom pods while boiling the syrup. 

Directions for making the Malpua:

Next, take oil for frying in a flat Karahi or pan preferably and heat. The flame should be medium-high. The oil should not be too hot, nor warm. When you put a little batter, it should sizzle. Now take a scoop of batter in a ladle and pour it into the hot oil. The batter will spread out by itself, like pancakes. Cook on one side and flip it over and cook on the other until both sides are equally golden brown. Remove from oil and drop in the sugar syrup for 10 seconds. Remove and store in a container. If storing for more than a day, let the Malpuas remain in the sugar syrup itself, so that they stay moist. Enjoy the sweet dish. Bon Appetit.

Directions to make instant Rabri ( optional) No pictures for this.

Ingredients:

Milk 1 cup

Sugar 2 tsp

Milk powder 2 tbsp

Directions for Rabri: Take one cup of milk and boil. When it reduces to half, add 2 tsp sugar and 2 tablespoons of milk powder and stir nicely. Within 2 minutes it will reach the desired consistency. Put off the flame and let it cool completely before plating.


STEPWISE RECIPE FOLLOWS:

1. Assemble all ingredients. In a bowl add the Gulab Jamun mix, Paneer, wheat flour, sugar, and mix. Now add milk little by little to make a batter of flowing consistency. Add fennel seeds, mix it in, and keep the batter aside.


2. To prepare the sugar syrup, add 1/2 cup water to 1 cup sugar and put it on the flame to boil. Keep stirring for the sugar to dissolve and boil for 2 to 3 minutes, not more. Put off flame and cool. Add 2 cardamom pods while boiling.


3. In a flat pan/Karahi take oil for deep frying and heat. The flame should be medium-high and the oil should be hot, but not smoking hot. When the batter is poured, it should sizzle.  Now take a scoop full of batter and pour it in the oil. Let it spread by itself. Fry until it turns golden brown on one side and then flip it and fry until golden brown on the other side too.


4. Now put the fried Malpua into the sugar syrup and remove after a few seconds if serving immediately. If storing for a day, let the Malpuas remain in the syrup so that they remain moist.


5. Serve warm with Rabri or just as it is. 


NOTES:

1. If the sugar syrup solidifies after some time, add a tablespoon of water and put it on the flame and keep the flame very low. The syrup will loosen. Put off the flame. You can keep repeating this process until all the Malpuas are fried,  if required.

2. A flat pan or Kadai is the perfect one for frying this sweet as in a curved Kadai the batter may turn to a ball and roundish, instead of a flat pancake-like shape.

3. Before pouring the batter, check if the oil is hot, by dropping some batter gently into the oil. If it sizzles immediately, the oil is ready for frying.


If you tried this recipe and liked it please comment below. I would love to hear from you. If you have a query about the recipe email us and ill respond as soon as I can.

If you would like to receive our recipes in your mail please leave your mail id at the homepage. Every time Rajjo's Kitchen has a new post we will mail the recipe to you.


Thursday 10 September 2020

LOBIA PULAV

 Lobia or Black-eyed Beans are a great source of plant-based protein. It has an adequate amount of fibre too and hence is a sought after food for weight watchers. All the same, it is a nutritious legume for everyone, whether weight watchers or not. It has many benefits and many dishes from different cuisine are made from it. 

In south India, it is used to make a Sundal/salad and is also used in making Kootu(a dal based gravy dish). In north India, a dal is made using Lobia, which is similar to Rajma. They are used in the famous dish of Kerala-Olan and is used in Mediterranean cuisine in Felafel and Salads. It is also made into flour, which can be added to the wheat flour while making Rotis.

Here I have made a Pulav using these Beans. This recipe is a good lunch box option as it is a meal in itself. It is easy to make and gets done in 30 minutes provided the beans are pre-soaked and cooked. To make this Pulav I have cooked the dal in a tomato-based gravy with spices and added the cooked beans to it.

While you are here please check out my other rice recipes like Masala Rice, Coriander Rice, Coconut Rice, Flavoured Rice, and more...

Here is the recipe of Lobia Pulav for you- 

  PREP TIME: 20 Mins(soak 2 hr)                         COOK TIME: 20Mins
 TOTAL TIME:40Mins                                            COURSE:  MAIN
 CUISINE:  NORTH INDIAN                                  SERVINGS: 5
 AUTHOR: Rajni Ram


Ingredients:

    Rice 1.5 cup cooked 

    Lobia/Karamani 100 gm (soaked for 2 hrs and cooked)

    Onion1 chopped finely

    Tomatoes 2 chopped finely

    Green chilli 1 chopped

    Cinnamon 1 inch stick

    Badi Elaichi 1 whole

    Shah jeera 1 tsp

    Cumin 1 tsp

    Cloves 5

    Fennel seeds/Saunf 1/2 tsp

   Black peppercorns 1.2 tsp

   Ginger-garlic paste 1/ tsp

   Turmeric powder 1/2 tsp

    Salt as required

   Red chilli powder 1 tsp

   Coriander powder 1 tsp

   Fennel powder1/2 tsp

   Biriyani powder 1 tsp(optional)

   Garam masala powder 1/2 tsp

  Coriander leaves finely chopped 1 tbsp


Directions:

Soak the Lobia for 2 hrs and pressure cook for 5 whistles. Cook the rice and cool it by spreading it on a plate and drizzle some oil on it, so that the grains don't stick together. Now take oil in a pan/Kadai and heat it. Add all the whole spices - Cinnamon, Cloves, Black cardamom/Badi elaichi, Fennel seeds, Shah jeera, Peppercorns to it. Fry for 10 seconds and add the green chillies and saute. Now add the ginger- garlic paste followed by chopped onions and saute until onions turn translucent. Now add the tomatoes followed by salt and cook, until the tomatoes turn mushy. Add all the dry spice powders-red chilli powder, coriander powder, fennel powder and saute for 2 minutes, until the masalas are well incorporated. Now add the cooked Lobia followed by a cup of water and cook for 2 minutes. Now add the biriyani powder(skip if you don't have it handy) and stir nicely. Start adding the cooked rice to the Lobia gravy, little by little. Mix nicely, such that the gravy coats the rice well. Sprinkle some Garam masala over it, and add some chopped coriander leaves. The yummy Lobia pulav is ready. Enjoy. Bon Appetite.    

STEPWISE RECIPE FOLLOWS:

1. Assemble all ingredients. Soak the Lobia for 2 hrs and pressure cook for 5 whistles. Cook the rice and cool it by spreading it on a plate and drizzle some oil on it, so that the grains don't stick together. 


2. Now take oil in a pan/Kadai and heat it. Add all the whole spices - Cinnamon, Cloves, Black cardamom/Badi elaichi, Fennel seeds, Shah jeera, Peppercorns to it. Fry for 10 seconds and add the green chillies and saute.


3. Now add the ginger- garlic paste followed by turmeric powder and chopped onions and saute until onions turn translucent. Now add the tomatoes followed by salt and cook, until the tomatoes turn mushy. 


4. Add all the dry spice powders-red chilli powder, coriander powder, fennel powder and saute for 2 minutes, until the masalas are well incorporated. Now add the cooked Lobia followed by a cup of water and cook for 2 minutes. 


5. Now add the biriyani powder(skip if you don't have it handy) and stir nicely. Start adding the cooked rice to the Lobia gravy, little by little. Mix nicely, such that the gravy coats the rice well.


6. Sprinkle some Garam masala over it, and add some chopped coriander leaves. The yummy Lobia pulav is ready. Enjoy. Bon Appetite. 


NOTES:

1. I have used the white Lobia here. This dish can be prepared with the Red ones, or even green peas and turns out absolutely delicious.

2. The Lobia should be well cooked but not mushy.

3. I have used Biriyani masala for extra flavouring, the dish tastes good even without it. 

If you tried this recipe and liked it please comment below. I would love to hear from you. If you have a query about the recipe email us and ill respond as soon as I can.

If you would like to receive our recipes on your mail please leave your mail id at the homepage. Every time Rajjo's Kitchen has a new post we will mail the recipe to you.

Tuesday 8 September 2020

OMAVALLI RASAM/AJWAIN LEAVES RASAM

 Rasam is a popular South Indian dish prepared with tamarind, tomatoes, and Rasam powder. There are many variations of this dish, and each South Indian household has its own recipe for the proportions of the ingredients of the rasam powder. Therefore though Rasam is almost a regular feature in all South Indian households its taste is unique to each. No two Rasam recipes taste the same. Rasam is also a sought after comfort food in South Indian households when one has a Cold(Common Cold) or is a little under the weather because it is made of simple ingredients that are easily digestible and pepper that helps in combating the cold. A good Rasam powder makes for a flavourful Rasam, the recipe for the Rasam Powder has been included here.


Earlier the Rasam was an everyday feature in most South Indian households along with Sambar or Vatha Kozhambu or Moru Kozhambu and a part of the Main course. Some households follow it to this day, but as the eating patterns of people has changed and is now more global the humble Rasam has taken a back seat or is made on a festival day where there is a feast(Elai Sapadu) or sometimes is also being served as a soup in elite gatherings.

The Omavalli/Ajwain leaves are medical and are believed to cure a common cold and boost immunity. These leaves are also used in making Pakodas and are really flavourful. Other than Rasam and pakodas the Ajwain leaves are also used to make a raita. This Omavalli rasam can be relished with hot rice and ghee or can just be sipped as a soup.
I have different varieties of Rasam in my repertoire like Pineapple rasam, Vetrilai Rasam/Betel leaves Rasam, Murungakkai/drumstick Rasam. Please check out the recipes of these Rasams while you are here.

Here is the recipe for Omavalli/Ajwain leaves Rasam. I have not given a stepwise picture for this recipe as I have included a video with important steps for guidance.

 PREP TIME: 10 Mins                                         COOK TIME: 20 Mins
TOTAL TIME: 30 Mins                                        COURSE:  MAIN / APPETISER
CUISINE: SOUTH INDIAN                                 SERVINGS: 4
                                                                            AUTHOR: Rajni Ram


Ingredients:

Omavalli/Ajwain leaves 5 big ones (2 small ones chopped fine)
Tomatoes 2 large
Green chilli 1
Tuvar dal/ Yellow lentils 1/4 cup cooked in a pressure cooker
Rasam powder 3 tsp 
Lemon 1/2
Coriander leaves finely chopped
Asafoetida 1 tsp (split 1/2 while boiling and 1/2 for tempering)
Turmeric powder 1 tsp
Salt as per taste
Mustard seeds 1/2 tsp
Roasted Pepper & Cumin powder 1 tsp( dry roast in the ratio 2:1 and grind coarse)

Directions: Grind the Omavalli/Ajwain leaves, tomatoes, and green chilli to a puree. Pour this puree into a 1-liter vessel and add 2 cups water. Put the vessel over the flame and add the Rasam powder, Salt, turmeric powder, and asafoetida and bring it to a boil. Keep boiling until the rawness of the tomatoes and the powders is gone. Now add a few chopped Omavalli leaves and continue to boil for 30 seconds. Add the dal water along with the mashed dal to the boiling puree. Add another 2 cups plain water and continue boiling until the rasam froths up and rises to the brim of the vessel. This should be done on low flame. When the rasam froths and rises, switch off the flame and add the juice of half a lemon. Now in a small tadka Kadai/pan take ghee/oil for tempering and heat. Add mustard seeds, as they crackle, add some Ajwain/Omam seeds, followed by asafoetida, cumin-pepper powder, and a few chopped Omavalli. Fry the tempering for 10 seconds. Put off the flame. Add curry leaves to the tadka/tempering. Now pour this tempering into the rasam, serve hot with rice and ghee or sip as soup.

Directions for making the Omavalli Rasam video here๐Ÿ‘‡


NOTES:
1. More Omavalli leaves can be used for an intense flavour.
2. I have also used the seeds while tempering, as it gives a nice aroma and flavouring to the dish.
3. I usually don't use tamarind for variety Rasam recipes like Vetrilai Rasam, Pineapple Rasam, Murungakkai Rasam and Omavalli Rasam, as I feel the acidity of the tamarind will suppress the flavours of these vegetables and herbs. So lime juice is a subtler option for the tanginess. But if one prefers tamarind to lemon, go ahead, but since I have not used tamarind anytime for these recipes, I'm not sure about the taste.

If you tried this recipe and liked it please comment below. I would love to hear from you. If you have a query about the recipe email us and ill respond as soon as I can.

If you would like to receive our recipes on your mail please leave your mail id at the homepage. Every time Rajjo's Kitchen has a new post we will mail the recipe to you.

Sunday 6 September 2020

PINEAPPLE RAITA

 Raita is a yogurt-based condiment. It usually contains cooked or raw vegetables/fruits/pulses, mixed with the Yogurt/Dahi and tempered with Mustard and Jeera. The Raita is usually served with Biriyani, Pulav, Parathas, Naans, or can be served as a dip for Kebabs too.

Raitas are a regular feature at my house. Whenever I make Parathas I usually pair it with a Raita instead of plain curd, and it goes without saying that Biriyani is almost always served with raita. I use raitas such as Mint raita as a dip for Kebabs too. I have different Raita varieties like Bhindi/Okra Raita, Mint Raita, Baigan/Eggplant Raita to my repertoire, please check them out while you are here.

This recipe of Pineapple Raita Is a very simple one and takes around 15 minutes to assemble. During the Pineapple season, I make this raita very frequently. It tastes good just by itself too, and I usually pair it with Parathas or Jeera Rice.

Here is this simple recipe for you-

PREP TIME: 10 Mins                             COOK TIME: 5 Mins
TOTAL TIME: 15Mins                            COURSE:  MAIN 
CUISINE: INDIAN                                  SERVINGS: 4


Ingredients:

Pineapple 100 gm (if buying slices 3 slices)

Curd 400 gm

Sugar 2 tsp (divided)

Salt as per taste

Red chilli powder 1/2 tsp  

Green chillies 2 chopped finely

Oil for tempering

Directions:

Gently smoothen out the curd with a whisk. Be gentle and avoid over whisking. Just 3 whisks will do. Put the Curd in the refrigerator in the meanwhile. Now dice the Pineapple to small cubes and cook them with 1/4 cup water and a pinch of salt and a teaspoon of sugar. The Pineapple pieces should be just cooked, prick a knife/fork, and if it goes without resistance, put off the flame. Cool the cooked Pineapple completely. Remove the curd from the refrigerator, add salt, 1 teaspoon sugar, red chilli powder and fold nicely. Now stir in the cooled Pineapple cubes and chill in the refrigerator until ready to serve. In a tadka Kadai/pan add 1 tsp oil and heat. Add the chopped green chillies to this and fry for 10 secs. Pour this tempering into the raita. The delicious Pineapple Raita is ready to serve. 

Serving Suggestions: With Parathas, Roti, Jeera rice, Masala rice or just by itself๐Ÿ˜€.

STEPWISE RECIPE FOLLOWS:

1. Assemble all ingredients. Dice the Pineapple and whisk the curd and put it in the refrigerator until required.

2. Cook the Pineapple pieces in 1/4 cup water, add a pinch of salt and 1 tsp sugar to it. Cook until just done and cool them completely.


3. Now get the curd out and add salt, followed by red chilli powder. In a small pan/Kadai heat some oil. Add the finely chopped green chillies and fry for 10 seconds. Pour this tempering into the Raita and chill in the refrigerator until ready to serve.


NOTES:

1. Over whisking the curd will make runny, so just smoothen out the curd with a ladle or whisk.

2. Adding sugar to the pineapple while cooking is optional, if the Pineapple is sweet, adding sugar can be avoided. I strongly recommend adding sugar to the curd though. The quantity of sugar in curd can be increased or decreased as per taste.

3. The green chilli tempering really elevates the raita to a different level, so try not skipping that step. 


If you tried this recipe and liked it please comment below. I would love to hear from you. If you have a query about the recipe email us and ill respond as soon as I can.

If you would like to receive our recipes on your mail please leave your mail id at the homepage. Every time Rajjo's Kitchen has a new post we will mail the recipe to you.


Friday 4 September 2020

PESARATTU/MLA PESARATTU/MOONG DAL CHILA

This recipe of soaked Moong beans and rice is one of my favourites as it is healthy and tasty at the same time. Simple recipe, just soak grind with ginger and spices and spread on the Tava like a Dosa/Adai and serve with Allam(ginger)chutney or any chutney. Yes, it is that simple. No fermentation.
What makes it special is the way it is served, and that's why in Hyderabad(AP) it is called MLA Pesarattu. Here the Pesarattu is stuffed with Rava Upma and served with Allum Chutney(Ginger Chutney). This whole recipe and serving have a very special place in my heart as it brings back memories of childhood because this is how we have always had the Pesarattu whether at home or from a Tiffin centre. This tiffin centre concept is also very specific to AP. Every locality has quite a few such centres that dole out the best breakfast dishes. They open up for business at about 7 am in the morning and finish by 10 am. These centres are mostly take away places. At night they open up at about 7 Pm to serve simple homemade Subjis and Rotis.   

Here I have given the recipe of Pesarattu and the chutney in detail. The Rava Upma is the usual one that we all make at home so have given only a brief explanation. Let's get to the recipe, but while you are here please have a look at my other breakfast/tiffin recipes like Kuthiraivali/Barnyard Millet Pongal, Adai, Rava Dosa, Moru Aval/Dahi Pohe and more...

Here is the recipe of Pesarettu, Upma and Allum(Ginger)Chutney. This is really a mega post. This is a post of 3 recipes, which can be made separately also as individual dishes.

PREP TIME: 20 Mins+Soak                               COOK TIME: 40Mins
TOTAL TIME: 60 Mins                                        COURSE:  BREAKFAST 
CUISINE: SOUTH INDIAN                                 SERVINGS: 5
                                                                            AUTHOR: Rajni Ram


Ingredients for Pesarettu :

Green Whole Moong 400gm(soaked 4 hrs)
Raw Rice 100g or 1/2 cup(soaked 4 hrs)
Green chillies 2 or 3 as per taste
Jeera 2 tsp
Ginger 1 inch piece

Directions to make Pesarettu batter:

Soak the Moong beans and the raw rice together for 4 hours. Drain all the water, put them in a blender, along with 1-inch piece ginger, green chillies and Jeera and grind to a smooth batter using water as required. The batter should be of Dosa/Pancake consistency.
 
How to make Pesarettu:
Heat a girdle/tava and grease with little oil. Now pour 2 medium-sized ladles of batter in the centre of the Tava and spread it like a Dosa. It shouldn't be as thin as a Dosa nor as thick as a Pancake. Cook on one side until crisp.


Onion filling for Pesarettu:
Ingredients:

Onions 2 large finely chopped
Green chillies 2 finely chopped
Jeera/Cumin 1 tsp

Directions for Onion filling:

In a pan pour 1 tbsp oil and heat. Add the cumin and as they splutter add the green chillies and chopped onions and saute. Saute until the onions turn translucent. Keep aside.  


Ingredients for Upma:

Rava/Sooji(Semolina) 1 cup  ( 1 cup =200 gm)
Water 2 cups
Salt as per taste
Ginger small piece finely chopped
Green chillies 2 finely chopped
Curry leaves a few
Oil for tempering
Mustard seeds 1/2 tsp
Urad dal 1 tsp
Chana dal 1 tsp
Ghee 1 tbsp

Directions to make Upma:

In a Kadai take 2 tbsp oil and heat. Put the mustard seeds and as they crackle, add the Urad dal, Chana dal and fry until light golden brown. Now add the ginger, green chillies and curry leaves and fry for 30 seconds. Now pour 3 cups water into the tempering( reduce flame before adding water, as the oil will splutter) add required salt and bring to a boil. When the water starts boiling, add the Rava/Suji a little at a time to the water and keep stirring simultaneously. The Rava will absorb all the water and the Upma will thicken in consistency. Put off the flame and add 1 tbsp ghee over it. The Upma is ready.


Ingredients for Allum(ginger chutney)

Ginger 100 gms chopped ( tender ones preferably)
Fried gram dal/chutney chana 1 tbsp
Dry red chillies 3
Tamarind a little small than gooseberry size
Cumin seeds 1 tsp
Jaggery 2 tsp
Oil for tempering
Mustard seeds 1 tsp
Curry leaves a few
Asafoetida 1/2 tsp
Salt as per taste 

Directions for making Allum Chutney:

In a Mixer jar put all ingredients except jaggery, oil, mustard seeds, curry leaves, salt and asafoetida, and grind them without adding any water, to a coarse paste. Now add about 1/4 cup( or less) water and grind it to a smooth paste. Add the jaggery and give it a final spin in the mixer. The chutney should not be runny. I added tamarind paste almost atvtye end, as I forgot it before. Temprring is optional. The yummy and spicy Allum Chutney is ready.


Assembling the MLA Pesarettu:

Once the batter is spread on the Tava, drizzle a little oil and let it cook on one side until crisp. The upper side will get cooked from the heat from below. Check for any rawness in the batter, if still raw on top, wait a few seconds and then spread the Onion filling on the Pesarett. Top this up with a scoop or two of Upma on one half of the Pesarett and cover/close with the other half(like exactly how it is done in Masala Dosa). The Pesarettu is ready. Serve it hot with Allum(ginger) chutney and enjoy this delicious and healthy dish. The video for assembling the MLA Pesarettu is here๐Ÿ‘‡.


NOTES:
1. Pictures of Upma have not been inserted. You can make a plain Rava Upma or add little onion and make onion Rava Upma. Adding vegetables to the Upma will make the dish very heavy.
2. All these dishes can be made as individual recipes too.
3. The chillies in the Allum Chutney can be reduced as per requirement. The jaggery can also be increased if required.
4. The Pesarettu can be served just with the chutney, minus the Upma.
5. Idli powder/gunpowder also goes well with this dish.

If you tried this recipe and liked it please comment below. I would love to hear from you. If you have a query about the recipe email us and ill respond as soon as I can.

If you would like to receive our recipes on your mail please leave your mail id at the homepage. Every time Rajjo's Kitchen has a new post we will mail the recipe to you.

Tuesday 1 September 2020

POTATO CHEDDAR BAKE

This is a very simple recipe and a great finger food/ starter option at get-togethers. Most of the prep can be done ahead and the baking can be done half an hour before serving. This dish can also be a tea time snack and the kids will love it. To make it healthy I have used roasted oats to coat the potatoes instead of cornflour. The baking can be easily replaced by the grilling method( on a girdle /tava).
 The cheddar cheese used in this recipe gives it a sharp taste and a crisp texture, the coriander and oregano give it a herby flavour.   The Cheddar cheese can be easily replaced by Parmesan Cheese, and it also tastes just as good.  I usually don't use a baking/parchment paper for this recipe and directly bake it on the baking tray, but this time I thought why not put it on a baking sheet, which turned put to be a wrong choice as I had to wait for 10 minutes to remove the potatoes from the sheet, so please don't repeat the same. Just grease the baking tray and follow the recipe without the baking sheet.

While you are here please have a look at my other snack recipes like Semolina Cheese Balls, Kothimbir Vadi, Moong dal Kachoris, Baked Wheatflour Papdis, and more...

Here is the recipe for Potato Cheddar Bake for you-

      PREP TIME: 20 Mins                                          COOK TIME: 20 Mins
     TOTAL TIME:40Mins                                           COURSE:  DESSERT
     CUISINE:  WORLD FOOD                                  SERVINGS: 6
     AUTHOR: Rajni Ram


Ingredients:

Potatoes small size( baby potatoes can also be used) 5 
Cheddar cheese/Parmesan Cheese 200 gm grated
Oats (instant) roasted 1 cup
Salt as required
Red chilli powder 1.5 tsp
Oregano 2 tsp(divided)
Black pepper powder 1/2 tsp
Peri-Peri powder 1/2 tsp(use more if you prefer)
Coriander leaves finely chopped

Method: Wash and peel the p[otatoes and slice them as shown in the picture. Heat water ina kettle/saucepan and pour the boiling water over the sliced potatoes and cover it and leave it for half an hour. After half an hour drain the water. Prick a fork into the potato, it should pierce with a little resistance. The potatoes should not overcook. Now dry roast the Oats in a pan until crisp ( approx 3 to 4 mins on low heat). Cool it. Put it ina grinder and powder it fine. To the oats powder add salt, red chilli powder and oregano and set aside. To the grated cheese add the pepper powder, salt and Peri Peri powder and mix nicely. Grease a baking tray( don't use a baking sheet as seen in the picture, read intro) with oil, spread a thin sheet of cheese mixture on the tray. Now take a slice of the potato, cover it with the oats powder nicely, such that both sides are coated well and arrange on the baking tray on top of the cheese layer. Repeat for half the amount of potato slices, and keep arranging them on the baking tray next to each other. Now sprinkle the cheese mixture over the potatoes, sprinkle oregano powder, top with some finely chopped coriander and put the tray in the oven. Bake at 200C for 20 minutes. The cheese should have melted and formed a crunchy layer over the potatoes. The cheese and crunchy Potato Cheddar Bake is ready to serve. Enjoy. Bon Appetit.

STEPWISE RECIPE FOLLOWS:

1. Assemble all ingredients. Peel and slice potatoes. Grate the cheese. Roast and powder the oats.


2. Pour boiling water over the sliced potatoes and let it stand covered for half an hour. Drain the water and prick a potato slice with a fork to check doneness. It fork should pierce it with little resistance. The potato should not be overcooked or mushy.


3. Now powder the roasted oats and add salt, chilli powder and oregano to it and set aside.


4. Take the grated cheese and add pepper powder, Peri-Peri powder(or red chilli powder) and a pinch of salt and mix well.


5. Now grease a baking tray with oil and spread the cheese mixture as a thin film on it. Now roll each potato slice in the roasted and spiced oats powder, such that both sides are well coated and arrange on the baking tray over the cheese mixture. This has to be done in two batches, as potatoes should not be overlapped for more than two layers.


6. Repeat for all potato slices and arrange them next to one another in the tray. Cover with more cheese mixture, sprinkle oregano powder over it, garnish with finely chopped coriander and pop it in the oven. Bake at 200 C for 20 minutes.
The Cheese should have melted and formed a crisp crust over the potatoes. The cheesy and delicious potato cheddar bake is ready.


NOTES:
1. As said in the introduction don't use a baking paper as it takes time to remove the potatoes off the tray.
2. Parmesan cheese can also be used instead of Cheddar or a half and half mix of both can be done.
3. If Peri-Peri powder is not available use regular red chilli powder or Cumin pepper powder that we use for Rasam ๐Ÿ˜‰.
4. The preparation of this dish can be done ahead, like blanching the potatoes, making the oat powder mix, making the cheese mixture etc and the baking can be done closer to serving time.

If you tried this recipe and liked it please comment below. I would love to hear from you. If you have a query about the recipe email us and ill respond as soon as I can.

If you would like to receive our recipes on your mail please leave your mail id at the homepage. Every time Rajjo's Kitchen has a new post we will mail the recipe to you.


TOFU AND STIR FRIED VEGETABLES IN HOT SCHEZWAN SAUCE

  Any Tofu lovers? I agree its an acquired taste,but going by the health benefits it has to offer, I try including it in my diet now and the...